Timeshift A System Restore Utility Tool Review

TimeShift is a system restore tool for Linux. It provides functionality that is quite similar to the System Restore feature in Windows or the Time Machine tool in macOS. TimeShift protects your system by making incremental snapshots of the file system manually or at regular automated intervals. 

These snapshots can then be restored at a later point to undo all changes to the system and restore it to the previous state. Snapshots are made using rsync and hard-links and the tool shares common files amongst snapshots in order to save disk space. Now that we have an idea about what Timeshift is, let us take a detailed look at setting up and using this tool. ​​

How to install Timeshift in Linux?

For Ubuntu and Ubuntu based distros such as Mint

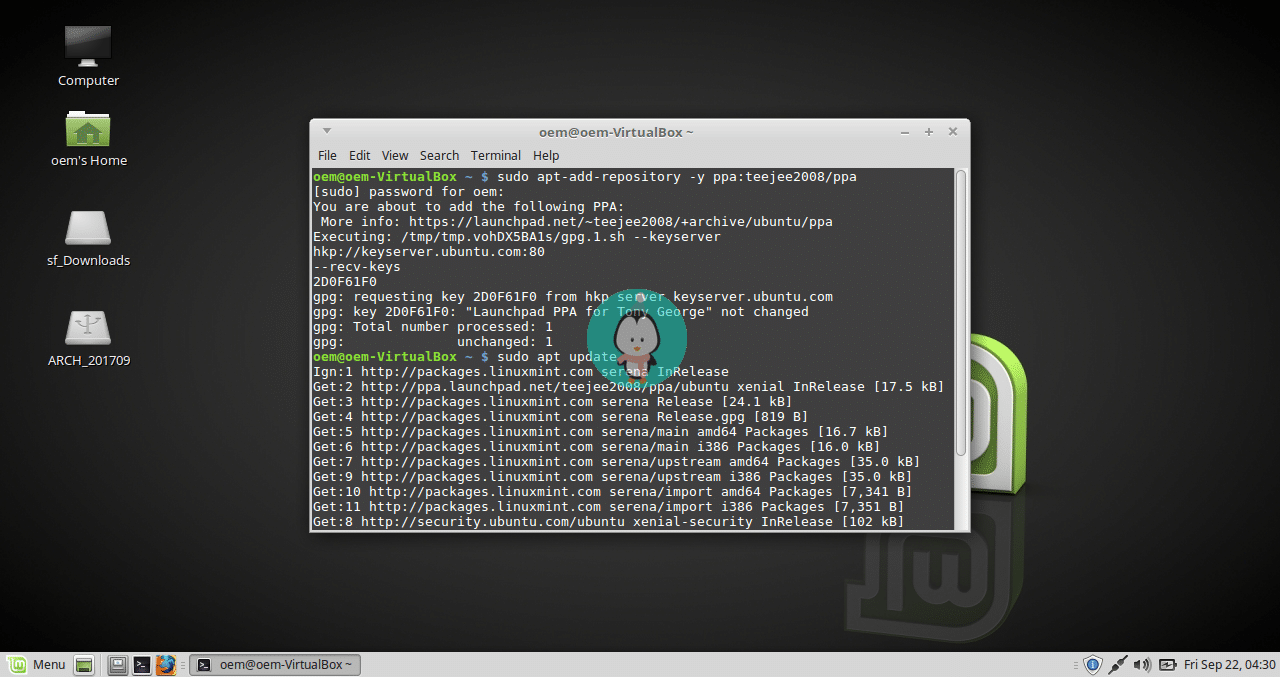
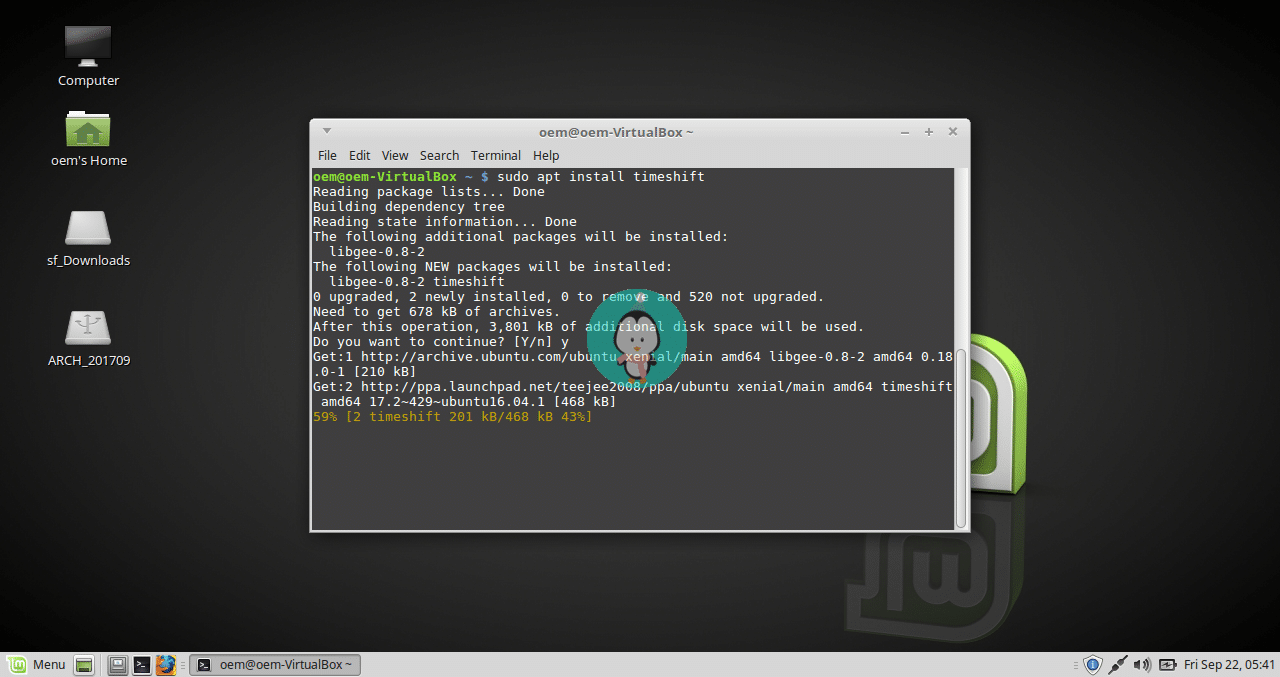
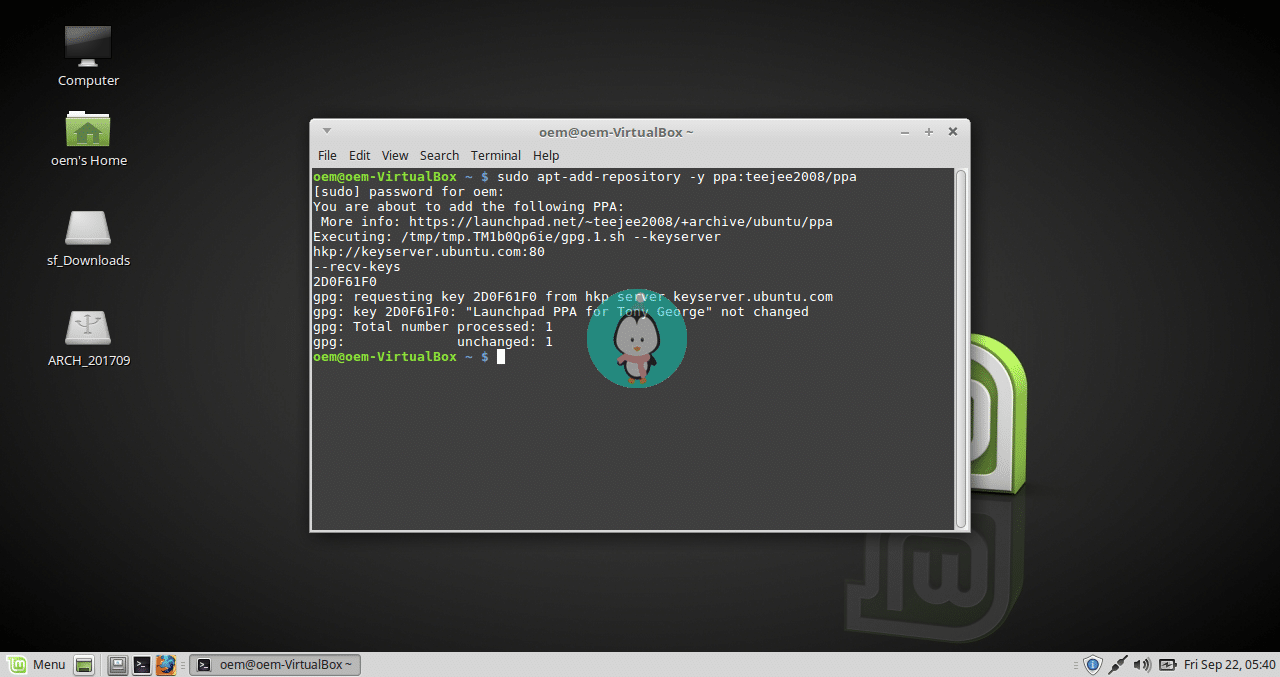
Packages are available in my Launchpad PPA for supported Ubuntu releases. Run the following commands in a terminal window:

sudo apt-add-repository ppa:teejee2008/ppa
sudo apt-get update
sudo apt-get install timeshift
timeshift installation
timeshift installation repository
Timeshift installing

Interface and Usage

​Timeshift is available as GUI but it can also be used from the terminal. Timeshift will require root or administrative permissions on startup as it allows you to modify essential parts of your system. With TimeShift, you can make snapshots automatically or manually. You can configure it for an automatic snapshot on an hourly, daily, weekly, or monthly basis. Or you can schedule snapshots to be made on every bootup. You can also configure how often snapshots should be removed.

timeshift interface
timeshift interface

Setup Wizard allows you to create Automated Snapshots

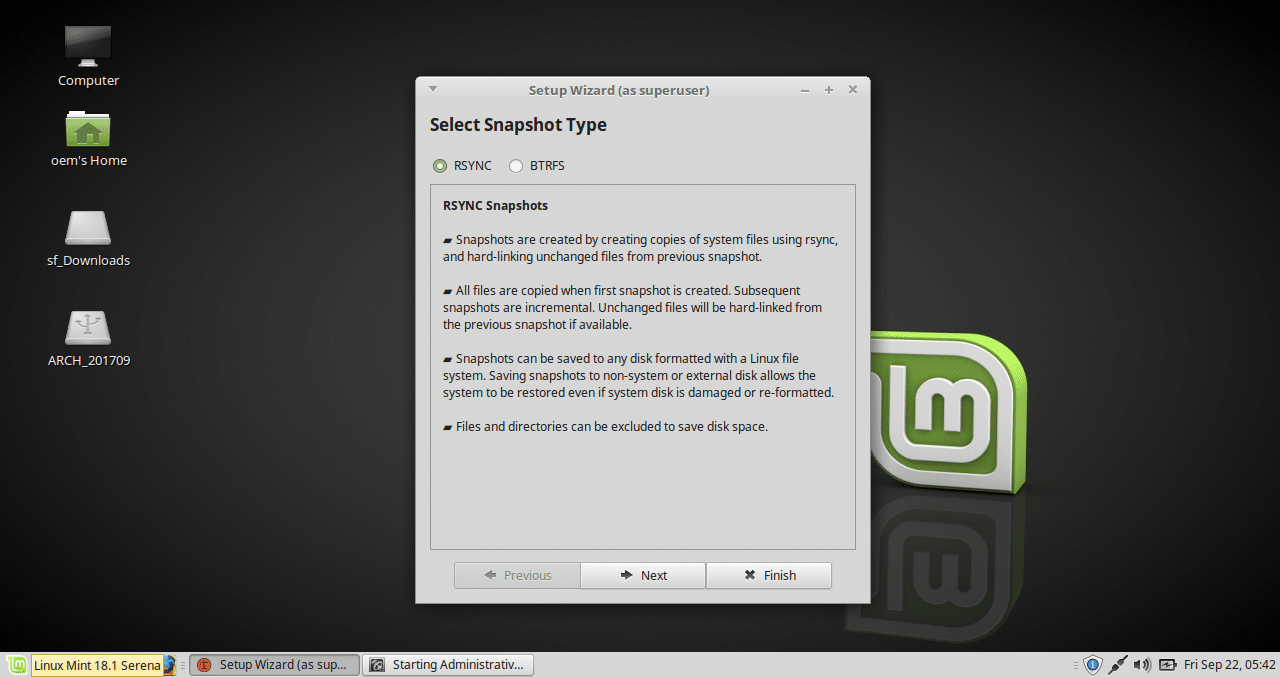
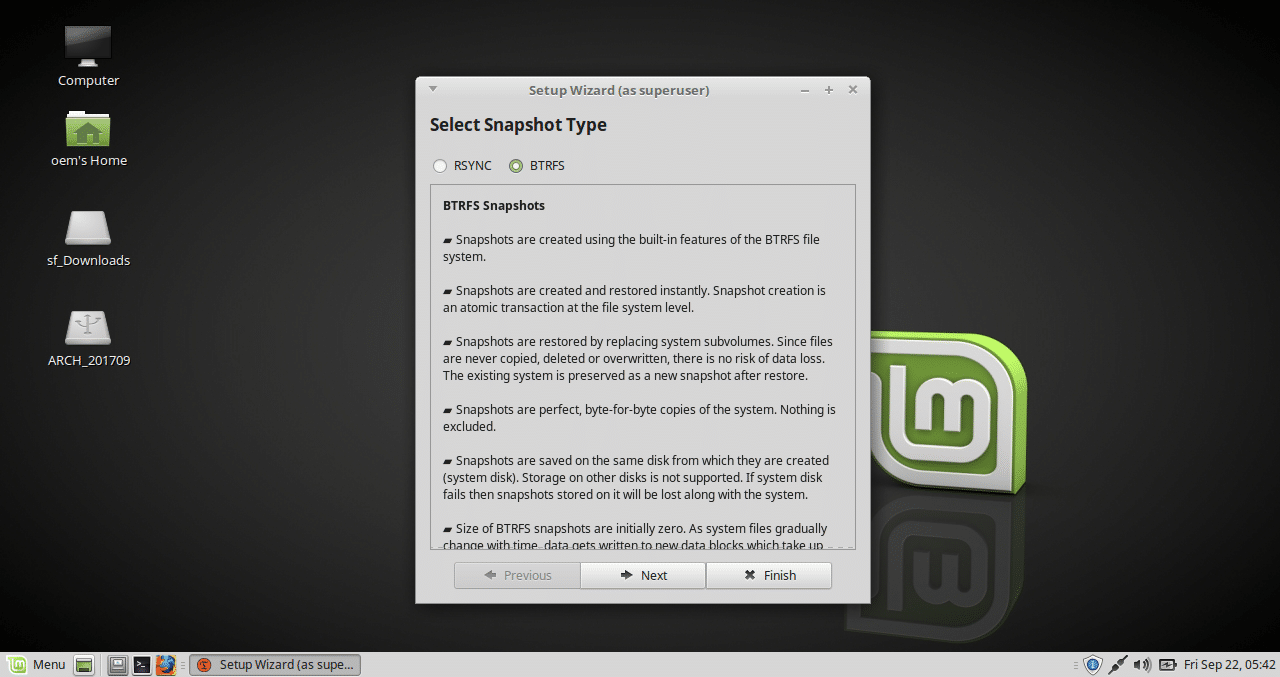
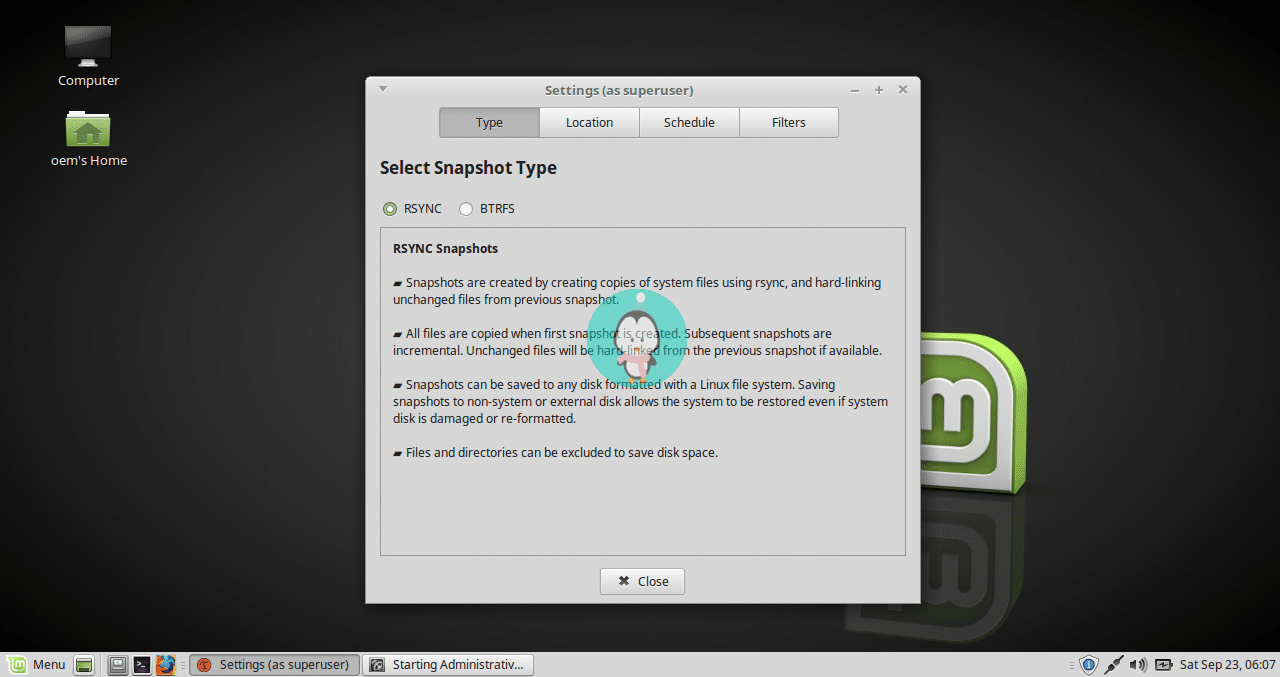
Select Snapshot Type

Timeshift supports 2 snapshot formats. The first is by using Rsync and the second is by using the in-built features of the BTRFS file system that allows snapshots to be created. So you can select the BTRFS format if you are using that particular filesystem. Other than that, you have to choose the Rsync format.

timeshift setup wizard
timeshift setup wizard select snapshot type

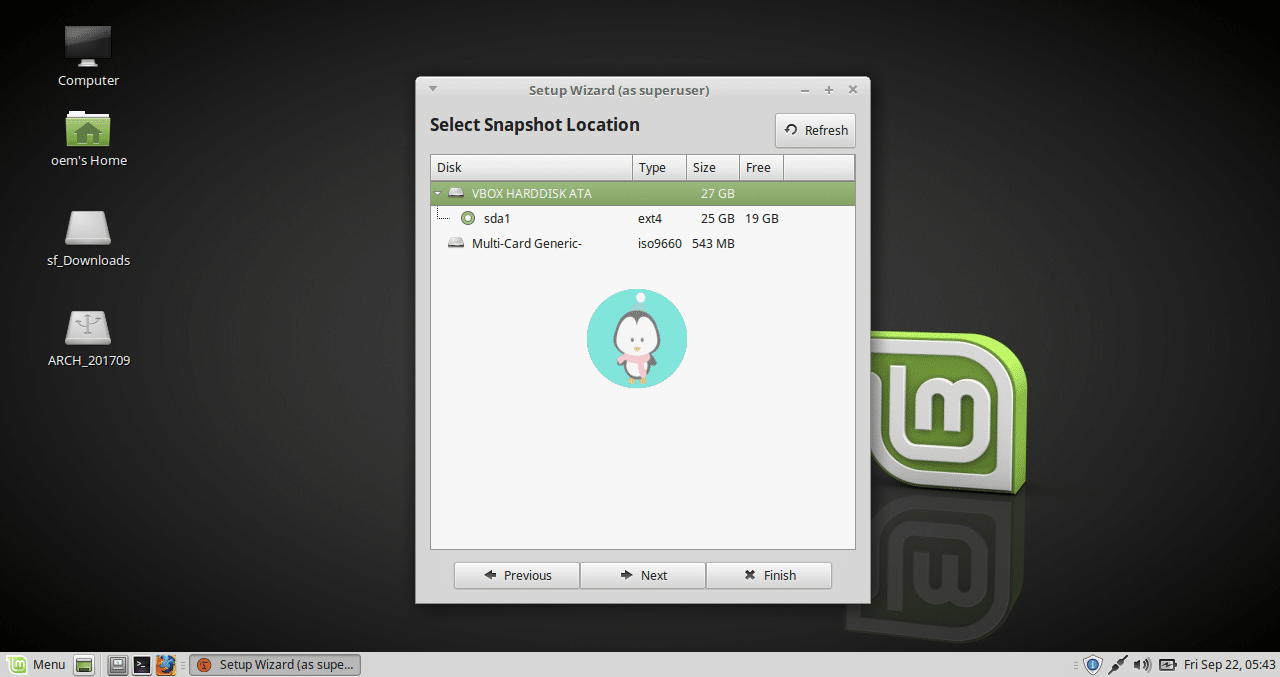
Select Snapshot Location

​The next thing you do is select your snapshot location. You can choose to have your snapshots on your local disk or on an external storage device.

timeshift snapshot location

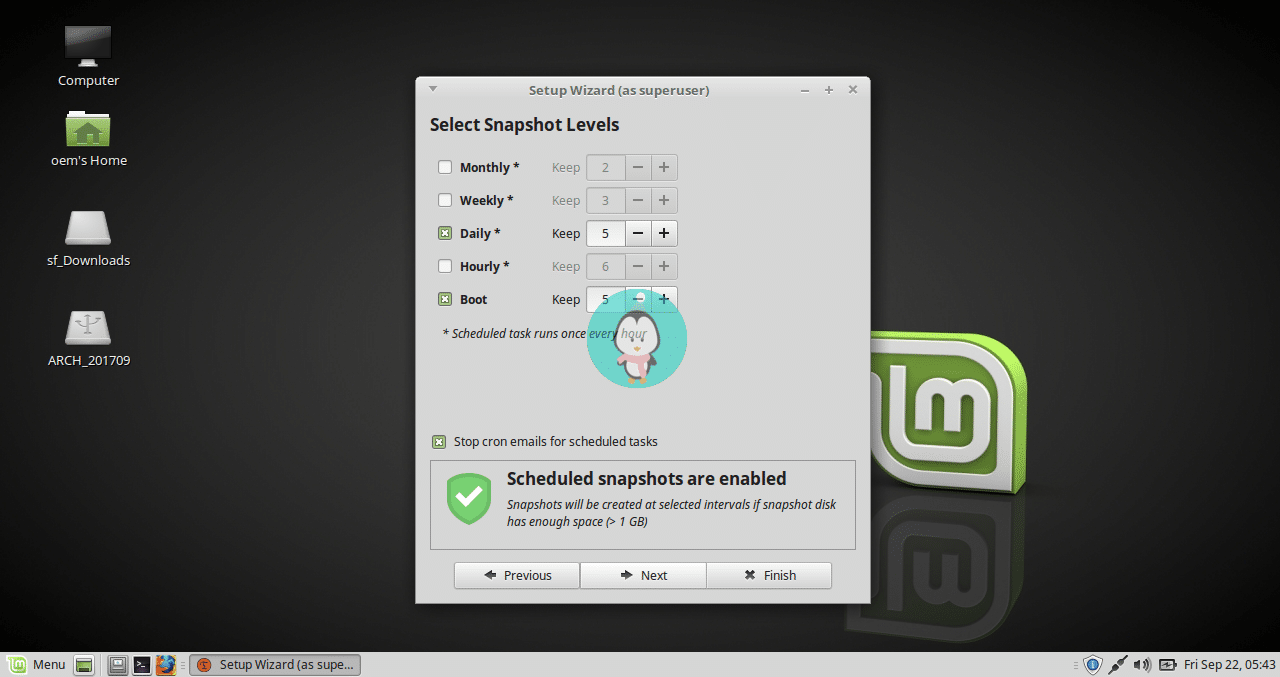
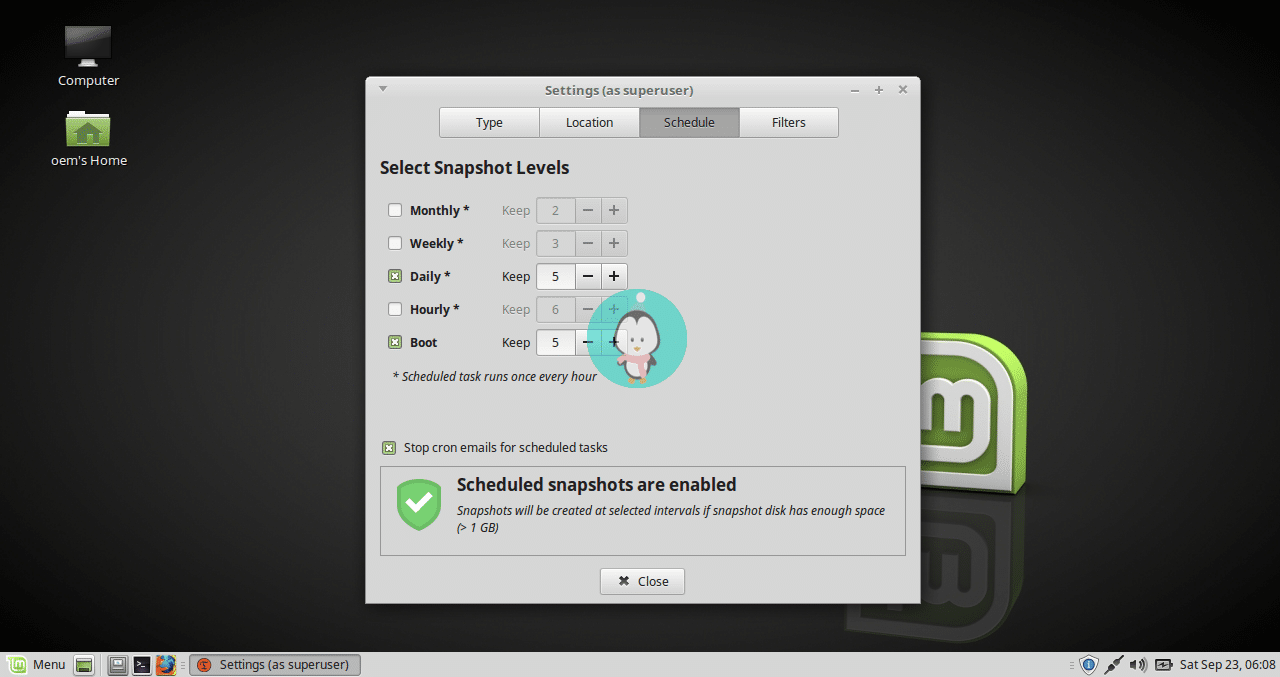
Select Snapshot Levels

​As I mentioned earlier, Timeshift allows you to create snapshots on hourly, daily, weekly, monthly or on a boot basis. So you can select the frequencies you want and the number of snapshots to keep.

timeshift snapshot levels

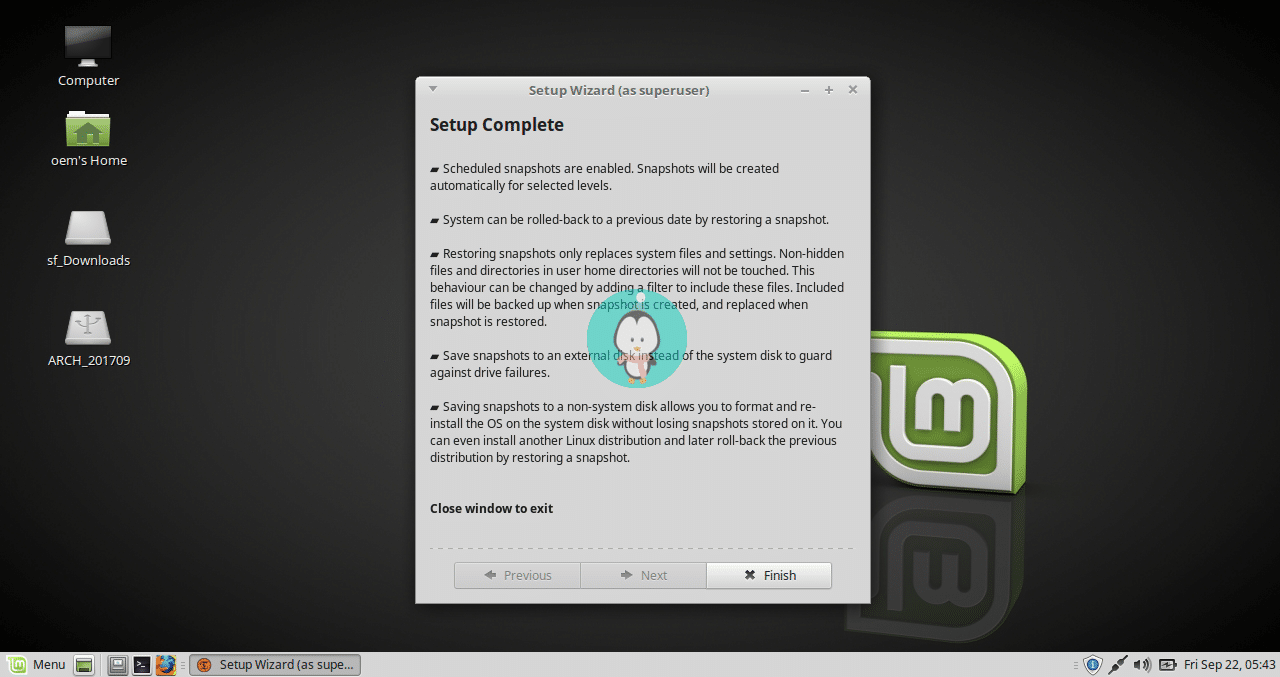
​And then foward to the next screen to complete your setup.

timeshift snapshot level
timeshift snapshot completed

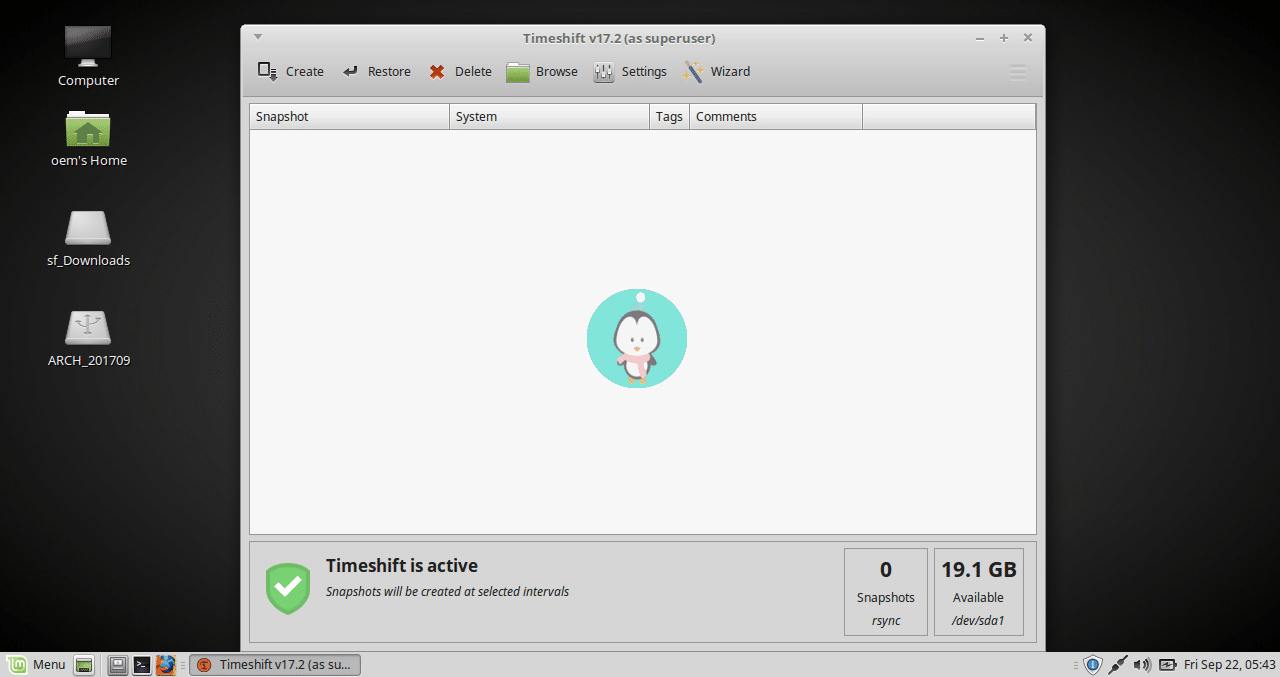
Main Screen

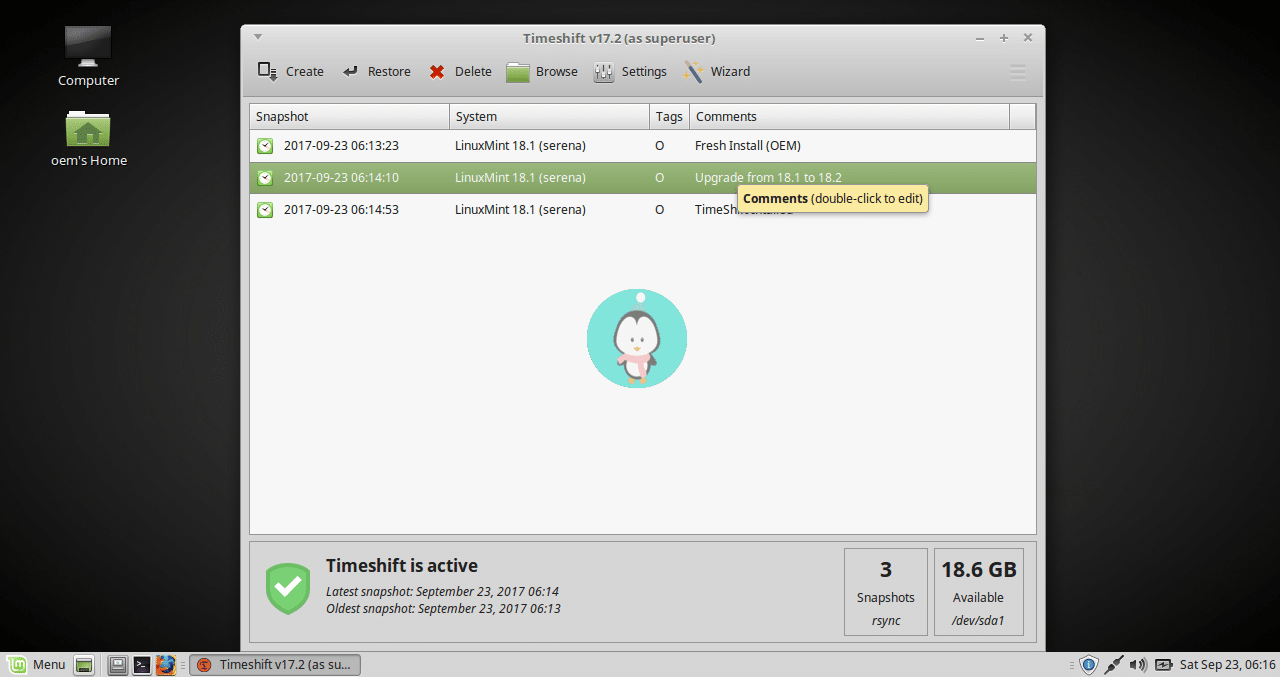
​Timeshift presents a very simple main screen. From here, you can create, restore or delete your snapshots.

timeshift main screen

Creating a Snapshot

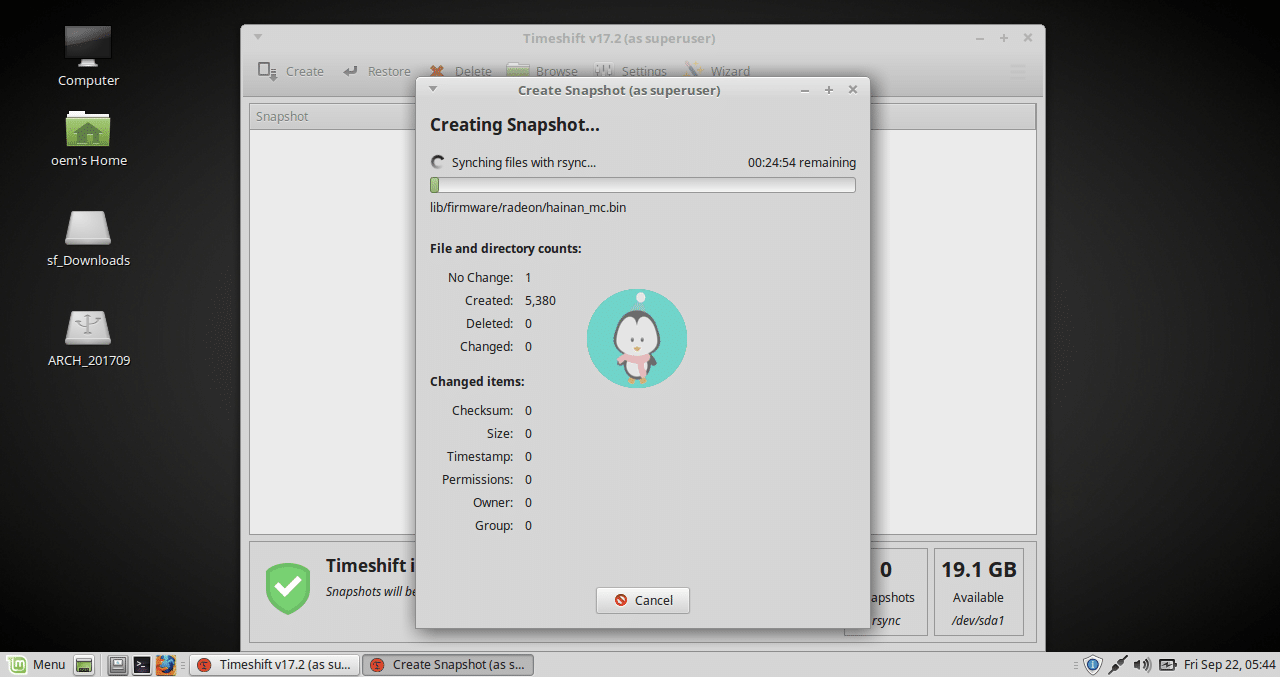
Creating a snapshot is simple. Just click on the Create button and then a snapshot will thus be created. Depending on what should be included or excluded from the snapshots, it will take a couple of minutes for the process to be completed.

timeshift creating snapshot

You can add comments to your snapshots so you can have a description of the snapshot.

timeshift creating snapshot

Timeshift Settings

​Timeshift allows users to customize how snapshots are made, what is included or not. Same as with the setup wizard, you can choose whether or not to use the Rsync or the BTRFS format.

timeshift setting
timeshift setting

You can also specify the location and then the schedule for automatic backups.

timeshift setting
timeshift setting

Filters

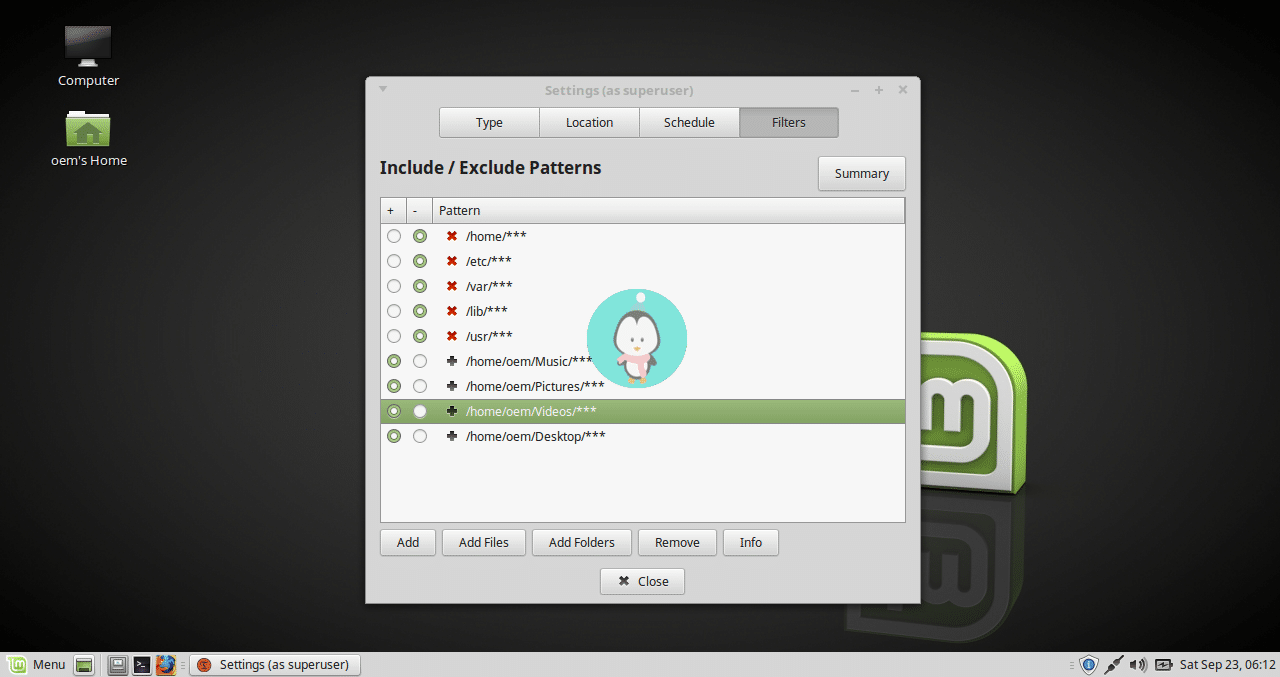
​You can also specify filters to include or exclude files or directories from the snapshots. TimeShift is designed to protect system files and settings. User data such as documents, pictures and music are excluded by default. This prevents you from overwriting your documents when you restore a snapshot or using all of your storage to backup media (pictures, music, and video) files. But you can change this using the Filters option in Settings.

timeshift filter
timeshift filter

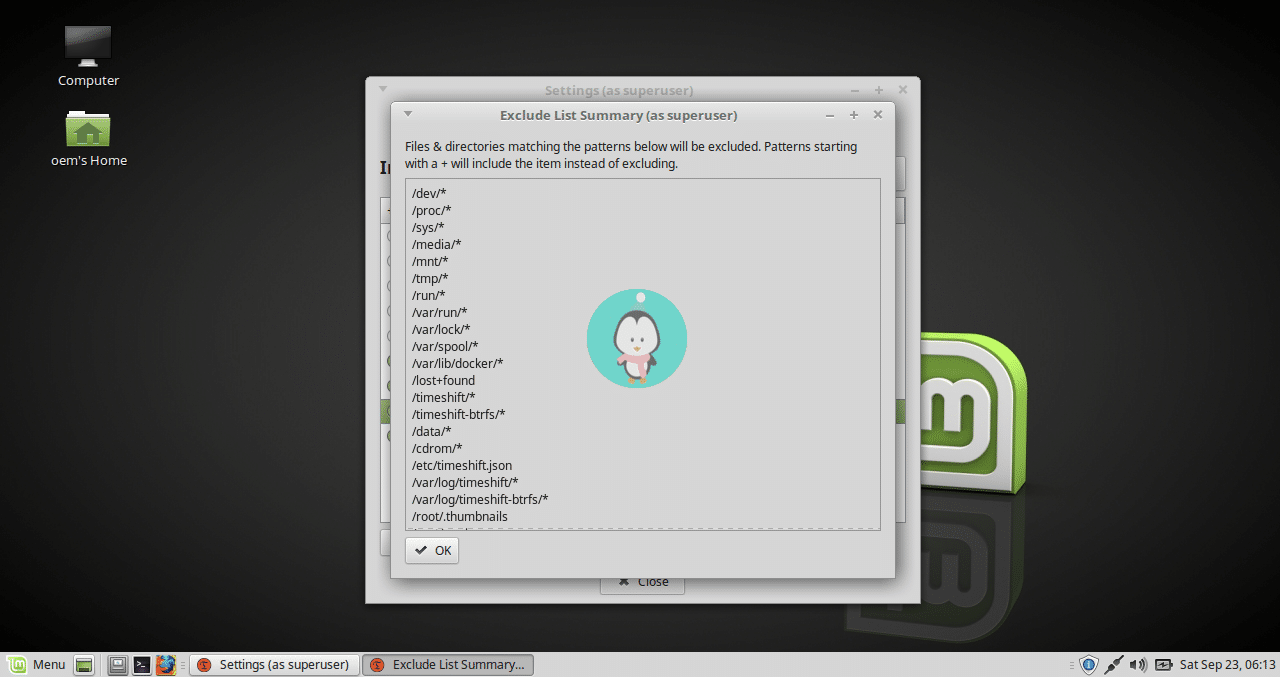
Clicking on the summary option under Filters will give you a fair indication of what is included or not.

timeshift filter
timeshift filter

Restoring Backup

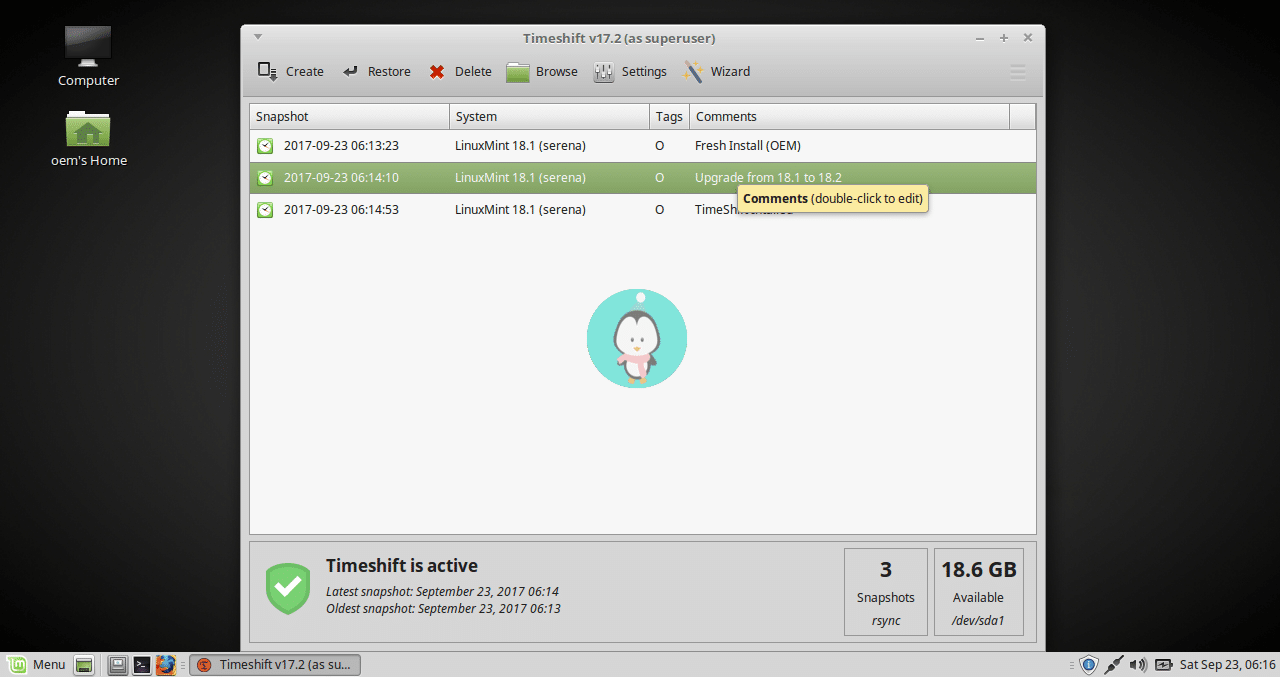
​Restoring a Backup is as simple as selecting the snapshot you wish to restore and clicking on the Restore button.

timeshift backup
timeshift backup

Target Device

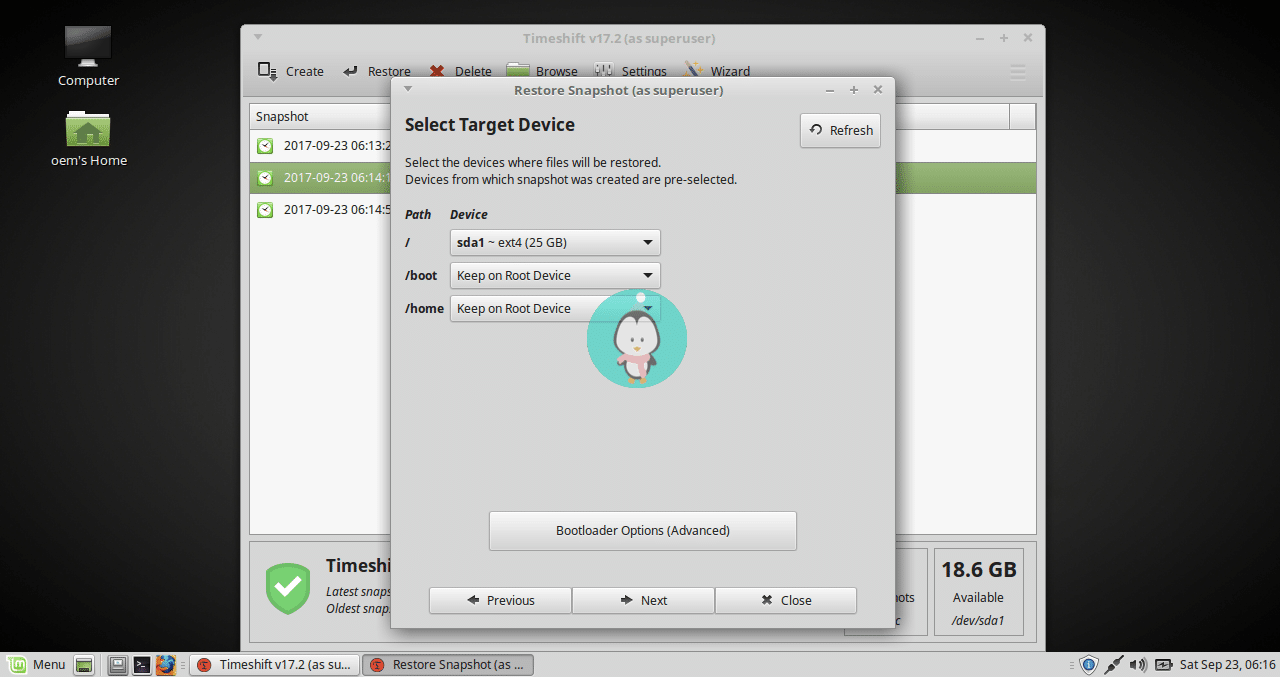
​And then you will select your target device where files will be restored. You will have to specify your root device and whether or not to keep the boot and home files on the root device or on another partition.

timeshift restore
timeshift restore

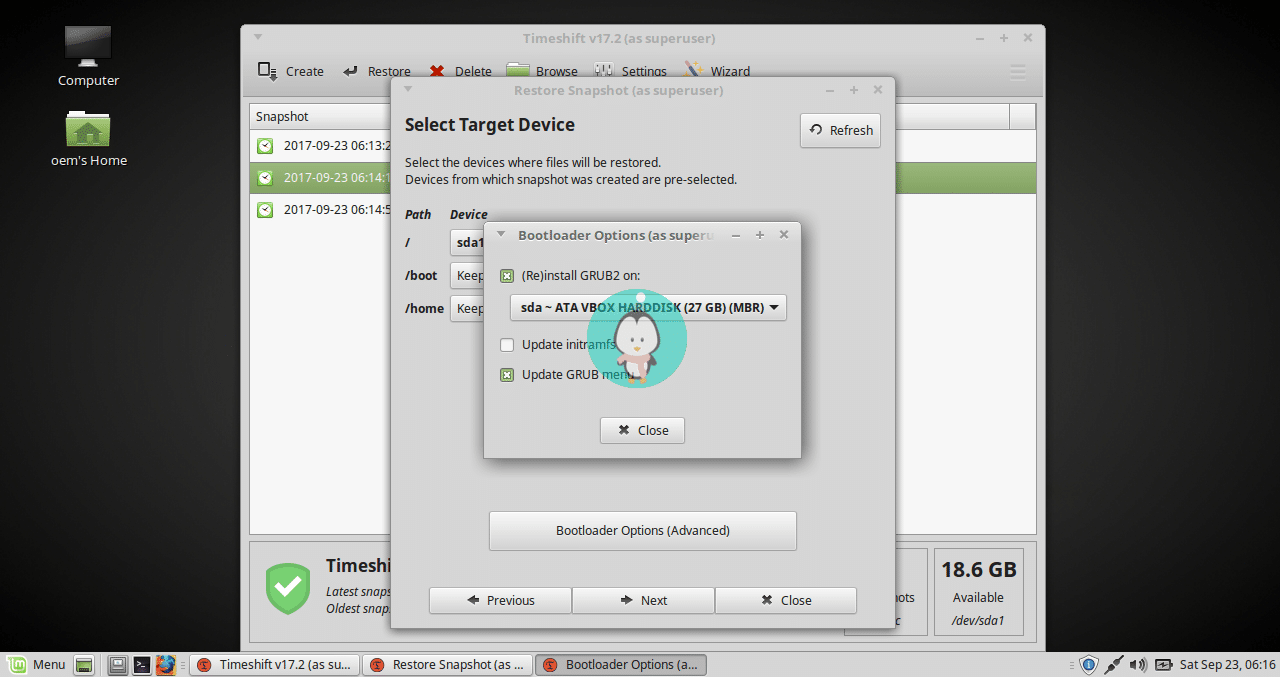
Bootloader options

​You then specify the bootloader options as to whether or not to reinstall GRUB2, to update or not intramfs and the Grub Menu.

timeshift bootloader

Exclude Application Settings

​You can select to exclude some applications especially Web browsers and Torrent clients or others from the restore process.

timeshift exclude application setting

Complete Process

Finally, you accept a disclaimer about things going wrong and then applying the restore.

timeshift complete process

Snapshot Restore

​The snapshot will be applied and then your computer will restart to complete the process.

snapshot restore

Conclusion

Timeshift is an awesome software around. It allows you to restore your PC to a previous state without any devastating consequences especially when something breaks or is not working well. I hope you find this tool useful. Thanks for reading and kindly share your thoughts with us in the comments section below.

SHARE THIS POST

MassiveGRID Banner
10 Comments Text
  • Can I use timeshift to backup an arbitrary directory. I have a /Development directory and I want to have appropriate backups for it. All I noted is that timeshift is self restricted to / or $HOME. Am I wrong about that restriction?

  • Its only shows how to restore on working system, would You provide ‘how-to’ when system can’t boot or hdd is damaged , please?

    • This, of course, is the “million dollar question” that so many articles on the Timeshift program are not covering.

      One article I just read said that you would boot from a live CD (or USB stick), and then restore from there. But that makes me wonder, since the boot drive is not mounted with root, whether such a thing will work.

      Of course, if it’s only the desktop that won’t load, and you can still get to a TTY terminal, timeshift has a commandline app that could be run.

      But it sure would be nice if some of the people writing the articles on Timeshift would do the more difficult work of handling the recovery scenario, under the various circumstances that we end-users will run into.

      • I have restored my Kubuntu system when it crashed beyond repair. I booted from a live CD, installed Timeshift on it and run it as I would from my system. I selected the snapshot I wanted to restore, and selected the partition where my system was.
        After Timeshift completed, The system rebooted without problems.

  • I am new to this program, and I only see one thing I might wish to change – assuming I correctly read how this works. Apparently it uses the root of a specified drive as a destination, and it cannot (that I found) be directed more precisely than that. This is only a potential problem for those like me, who run multiple distros on their system. How would I (or it) keep track of which distro the snapshots are for? Or does that mean that I can’t use the same (data) disk for more than one setup? If so, it is a pity, as I have 4tb drive, visible to all 5 distros. that I would love to specify as the destination.

    Even allowing a partition to be specified would allow (with help from gparted) a workable setup to be created, perhaps with a label denoting which contains what. A directory structure within the timeshift directory would be even simpler, of course 🙂

    Oh wait, I think I selected sdd1 – so partitions are selectable perhaps… I’ll go try that before adding more to this! Thanks for the application, though – this is the main thing I don’t have covered well, especially as 3 of my setups are rolling releases!

    Freebird54

  • When restoring DUAL BOOT SYSTEMS using GRUB2, you need to uncheck the default settings in the Bootloader Options (Advanced) dialog unless you have installed another version of the OS and are trying to roll it back to a previously installed version. Even so, I have heard that this can cause problems with grub which later need to be repaired manually. If it is a routine roll back, say for an update or a new application, be sure to uncheck these boxes on a dual boot system.

  • This is the only website I have found which mentions the ability to exclude applications from the restore process.

    Why is it recommended to NOT restore browsers (Google Chrome, Firefox, etc.)? If you also backup your /home/.*** directories and files, the rollback should work. I do not like to take default settings on TimeShift without understanding what is going on and the rationale for the defaults. The web has many dozens of reports of problems with TImeShift, usually asking for help after it has messed things up. The documentation on the TeeGee website is notoriously incomplete and at this moment, several images of dialogs with broken links.

  • Leave a Reply

    Your email address will not be published. Required fields are marked *