

GIMP is a pretty awesome free and open source imaging tool that does a lot right in providing a very remarkable alternative to the hugely popular premium Photoshop. GIMP does a lot right for those who make the switch but then there is always a learning curve in getting used to the interface, the shortcuts, and others. What if we could make a few tweaks and changes to make your GIMP set up the look and work more like Photoshop. This post looks at 6 simple ways of making GIMP look and work a bit like Photoshop. Most of these tweaks are pretty easy to achieve so let’s get started.
1. Switch to single-Window UI
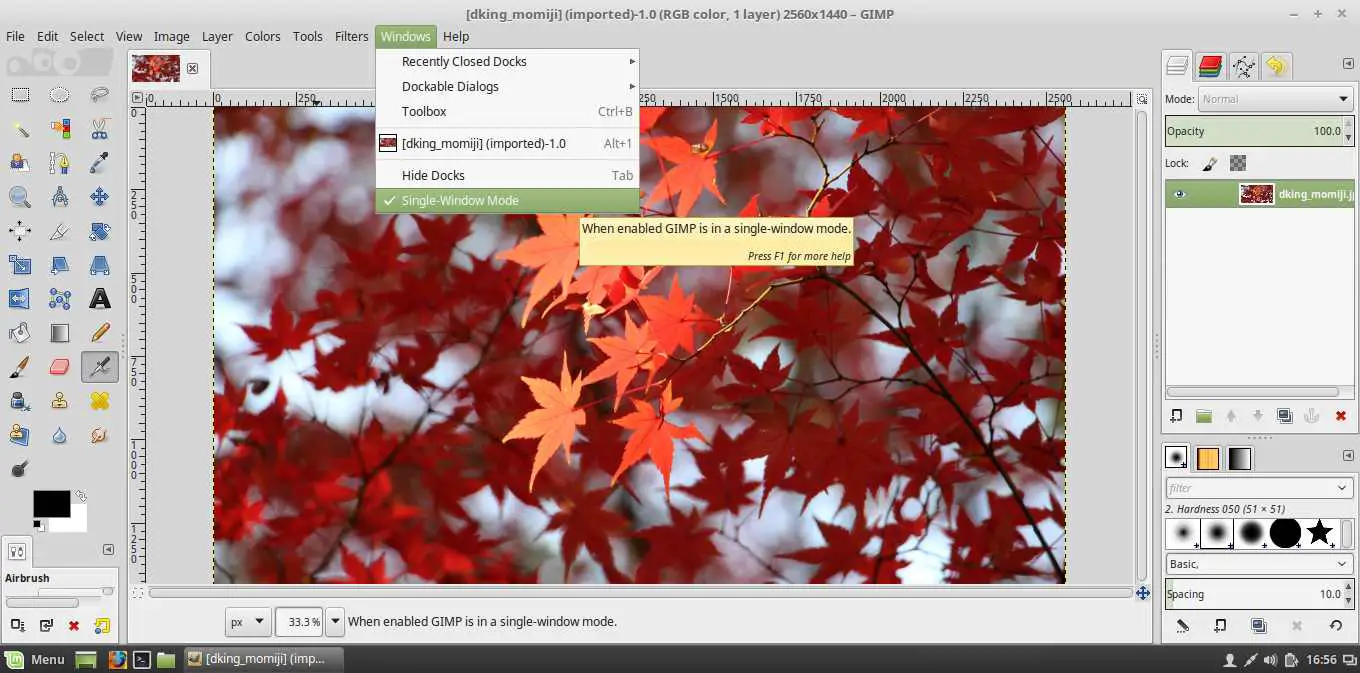
GIMP defaults to a multi-window setup that may appear quite confusing to new users. This can be easily remedied as GIMP has a built-in single UI mode. From the main menu, navigate to Windows and Select ‘Single-Window ‘ Mode.
Also Read – Basic Photo Editing With GIMP
2. Set Up Photoshop Keyboard Shortcuts in GIMP
The next thing transformation to do is to swap the default GIMP keyboard shortcuts for ones that work exactly like Photoshops. Do the following to change the keyboard shortcuts
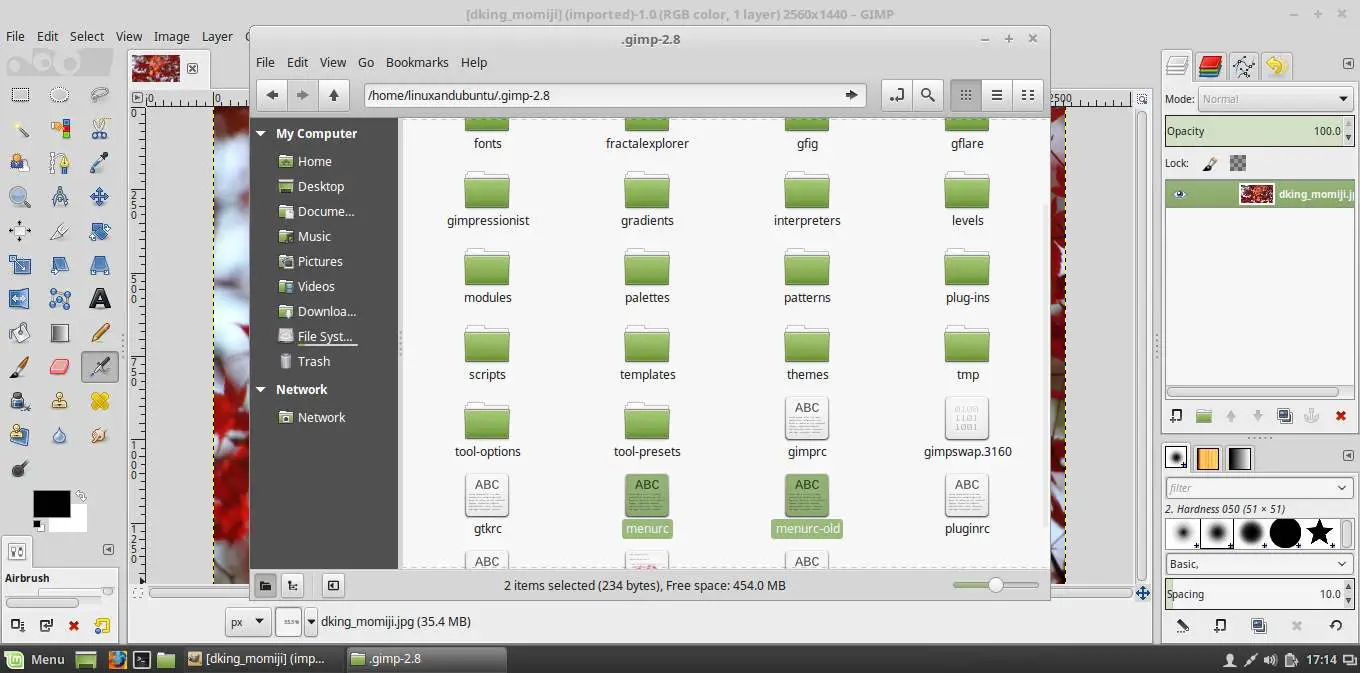
- Download ps-menurc file from freeshell.org. (Right-click and select save as if your browser opens it in another tab).
- Navigate to the GIMP installation folder (~/.gimp-2.8) and rename the existing to something else (e.g. menurc-backup).
- Rename the ps-menurc file to menurc and move it into the installation folder (~/.gimp-2.8).
- Restart GIMP for changes to take effect.
3. Make “Snap to Canvas Edge” the default behavior
Another thing that I find frustrating with GIMP is that it does not activate “Snap to canvas edges” by default even though the option is turned off by default. Unfortunately, you cannot turn this on by toggling in a setting. To make this change, we go back to the gimp folder (~/.gimp-2.8). Open the “gimprc” file and add the following at the end and then save it.
(default-snap-to-canvas yes)
(default-snap-to-grid yes)
4. Disable the default “Show Layer Boundary”
GIMP employs a black and yellow dotted line to indicate the boundaries of active layers. I personally find this quite useful but many others do not. New converts from Photoshop can easily change this if they find it undesirable. Navigate to Edit > Preferences > Image Windows > Appearance and uncheck ‘Show Layer Boundary under both Normal and Fullscreen Modes’. Restart GIMP for changes to take effect.

5. Make the Move tool work like Photoshop’s
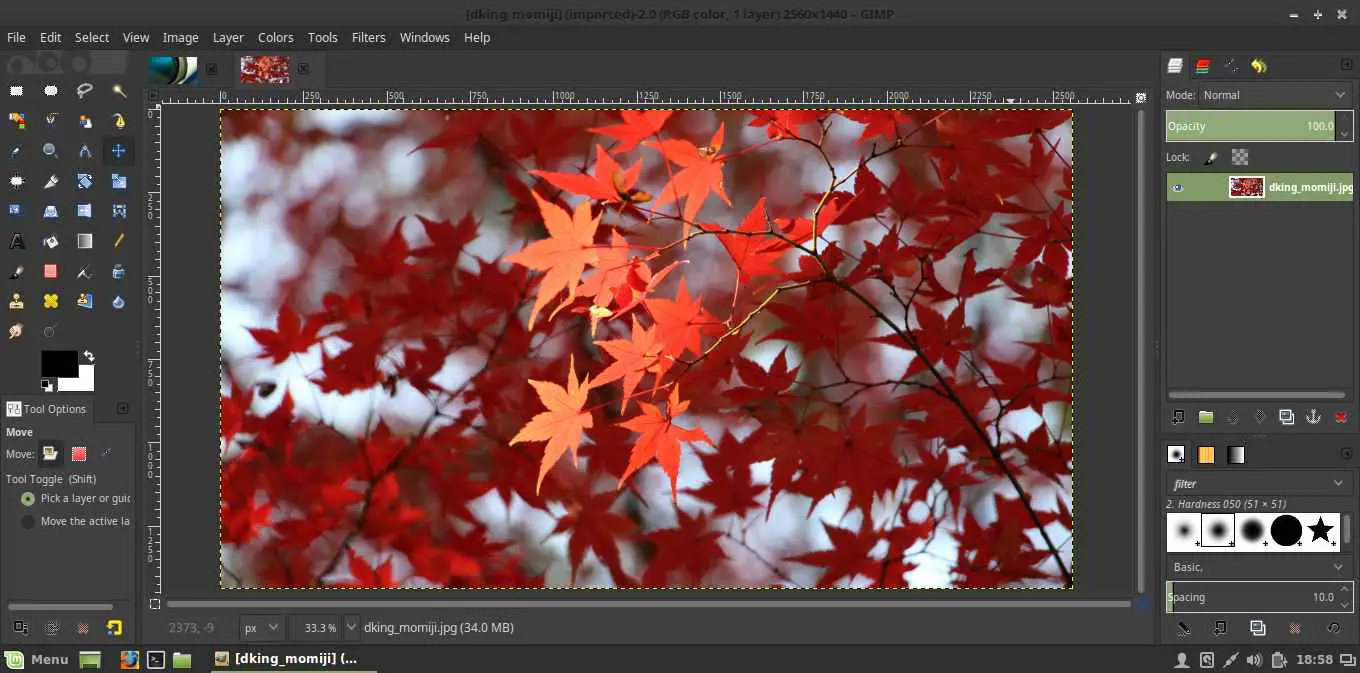
By default, GIMP’s Move tool will pick either a Layer of a Guide and this can be quite annoying as Photoshop does things differently. To change this behavior, select the Move tool, then go to the tools option dialogue box (see image below) and then check ‘Move the Active Layer’. Then go to Edit > Preferences > Tool Options > Save Tool Options Now to save the settings as default. Once again, you have to restart GIMP for the settings to take effect.

6. Give GIMP a dark theme
The last thing to do is give GIMP a dark theme which is way easier on the eyes. On my Linux Mint desktop, all I had to do was change my Mint theme to a dark one. If you do not have a dark theme installed, you can also download the PrudenceDark theme, copy it to the themes folder in your GIMP installation and then got to Edit > Preferences > Theme and then select the new theme for it to take effect.
Conclusion
GIMP is a pretty awesome photo editing tool. The developers are certainly not interested in making it behave like Photoshop, but having it behave like Photoshop at least in some ways will go a long way in helping converts adapt to it. How much do you like GIMP now after this transformation? Share your thoughts and comments with us in the section below.