Overview Of tcpdump With Examples
Table of Contents
You can view information about traffic coming and going from a given network interface using tcpdump. This diagnostic tool allows you to see packet information, that is where incoming packets come from and where outgoing packets are heading to on an interface, with some extra information. You can even save the output to a file to inspect later on. This article will demonstrate simple examples of tcpdump.
tcpdump Default Behavior
Running tcpdump with no parameters will look for the first active interface it finds and displays information about packets coming in or going out of a network device until the process is either interrupted (by pressing Ctrl-C) or killed. Superuser privileges are required when using tcpdump.
$ sudo tcpdump
Once the command is terminated, the output will show how many packets were captured, how many were actually received, and how many the kernel dropped.
Viewing Parameters
A different interface can be selected to view traffic information. To know which interfaces tcpdump will run with, the ‘-D’ parameter will show a list of devices that can be used as parameters.
$ sudo tcpdump -D
Now that you have a list of usable interfaces, you can specify one to use tcpdump on.
$ sudo tcpdump -i enp0s3
If you want to limit output to only a certain amount of packets, use the ‘-c’ (count) parameter to specify how many packets to capture and display information for before terminating itself.
$ sudo tcpdump -c 20

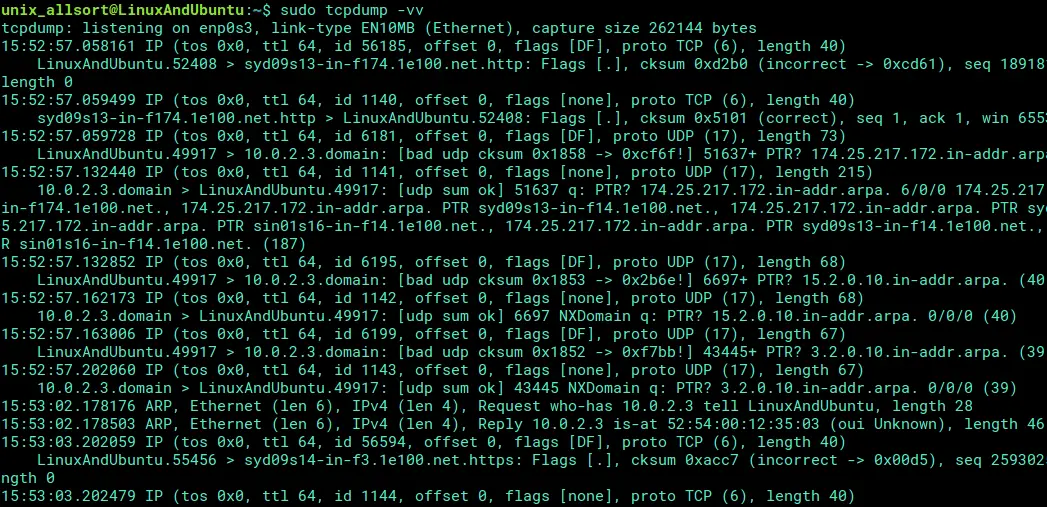
More detailed information can be displayed using the ‘-v’ (verbose) parameter. Such information includes the time-to-live (TTL), the packet length, protocol, and other information useful for diagnostics. To increase the amount of output for each packet, use either the ‘-vv’ or ‘-vvv’ parameter with tcpdump.
$ sudo tcpdump -v
$ sudo tcpdump -vv

$ sudo tcpdump -vvv

Saving To And Reading From Files
Tcpdump can save the output to a file for later viewing by tcpdump using the ‘-w’ parameter along the name of the file to write the file to. The only thing to remember is that the file created can only be read by tcpdump as it’s not in a plain-text format. To write the tcpdump output to a file (name it anything you wish) while the output is shown on the terminal, run this:
$ sudo tcpdump -w packets.dump
To read this file later, use tcpdump with the ‘-r’ parameter:
$ sudo tcpdump -r packets.dump

Filtering Packets
Filters can also be used with tcpdump to only capture packets to and from certain hosts and/or ports, and packets that use a specific protocol (e.g. TCP or UDP). There are other, more advanced filters; however, here are just a few simpler examples: Capture only TCP packets:
$ sudo tcpdump ‘tcp’
Capture only UDP packets:
$ sudo tcpdump ‘udp’
Capture HTTP packets (typically uses port 80):
$ sudo tcpdump ‘tcp port 80’
Only capture packets traveling to or from a specific host:
$ sudo tcpdump ‘host www.linux.org’
Only capture HTTP packets traveling to or from a specific host:
$ sudo tcpdump ‘tcp port 80 and host www.linux.org’

Conclusion
As demonstrated, tcpdump is quite a simple and useful diagnostic tool to use for displaying and saving packet information through a network interface. By all means, take the time to play around with tcpdump further as there are other features not shown here.
LinuxAndUbuntu Newsletter
Join the newsletter to receive the latest updates in your inbox.


