

Boxes or GNOME Boxes is virtualization software for GNOME Desktop Environment. It’s similar to Oracle VirtualBox but features a simple user interface.
Boxes also pose some challenges for newbies and VirtualBox users. For instance, it’s easy on VirtualBox to install guest addition images through the menu bar, but the same isn’t valid for Boxes. Instead, we encourage users to install additional guest tools from the terminal program within the guest session.
This article will provide a walkthrough on how to use GNOME Boxes by installing the software and setting a guest session on the machine. It will also take you through the steps for installing the guest tools and provide additional tips for Boxes configuration.
Purpose of virtualization
What is the purpose of virtualization, and why do most computer experts and developers use them a lot? There is usually a common reason for this: TESTING.
Developers who use Linux and write software for Windows have to test their program on an actual Windows environment before deploying it to the end-users. Virtualization allows him to install and set up a Windows guest session on his Linux computer.
Ordinary users also use virtualization to experiment with their favorite Linux distros that are still in beta release without installing them on their physical computers. If the virtual machine crashes, the host remains unaffected, and the critical files and documents stored on the physical disk remain intact.
Virtualization allows you to test software built for another platform/architecture, including ARM, MIPS, SPARC, etc., on your computer equipped with another architecture, such as Intel or AMD.
Installing GNOME Boxes
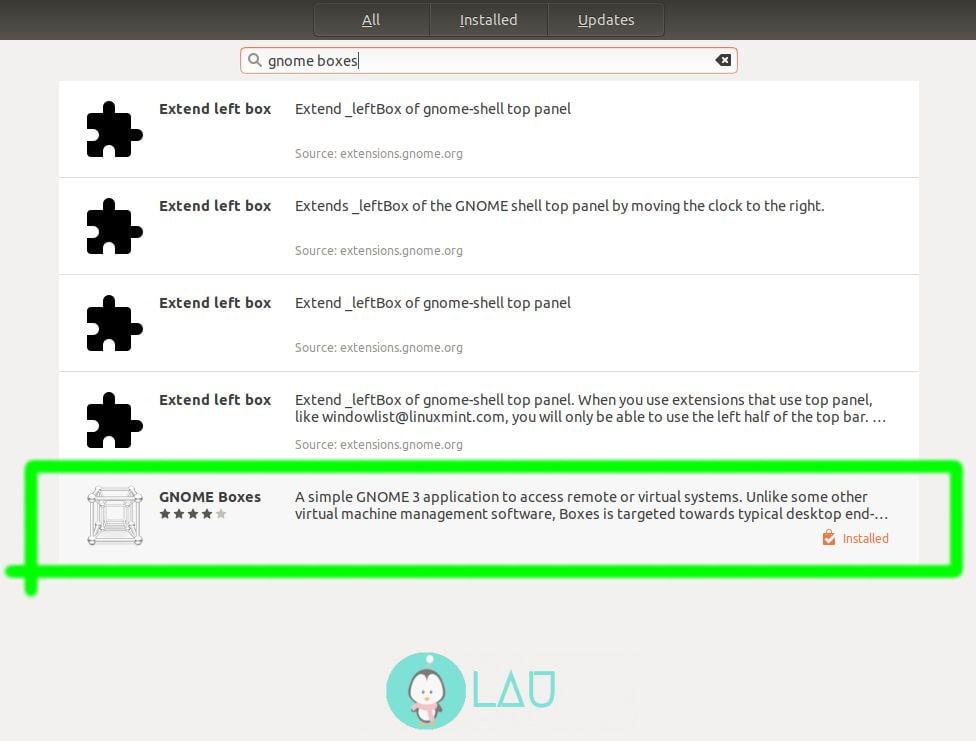
Launch Ubuntu Software and key in “gnome boxes”. Click the application name to load its installer page and then select the Install button.
Extra setup for Ubuntu 18.04
There’s a bug in GNOME Boxes on Ubuntu 18.04; it fails to start the Virtual Machine (VM). To remedy that, perform the below two steps on a terminal program –
- Add the line “group=kvm” to the qemu config file
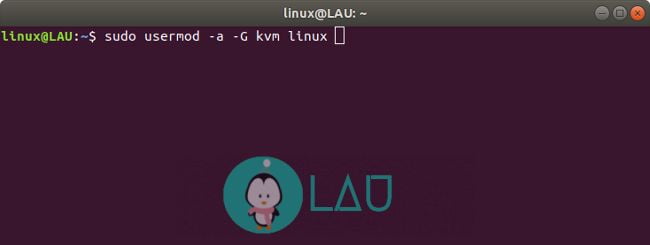
sudo gedit /etc/modprobe.d/qemu-system-x86.conf - Add your user account to kvm group
sudo usermod -a -G kvm <your account name>
After that, logout and re-login again for the changes to take effect.
Downloading an image file
You can download an image file/Operating System (OS) from the Internet or within the GNOME Boxes setup. However, for this article, we’ll proceed with the practical method, i.e., downloading an image file from the Internet. We’ll be configuring Lubuntu on Boxes, so head to this website to download the Linux distro.
To burn or not to burn
If you have no intention to distribute Lubuntu to your friends or install it on a physical machine, then it’s best not to burn the image file to a blank disc or portable USB drive. Instead, leave it as it is. We’ll use it for creating a VM afterward.
Starting GNOME Boxes
Below is the interface of GNOME Boxes on Ubuntu –
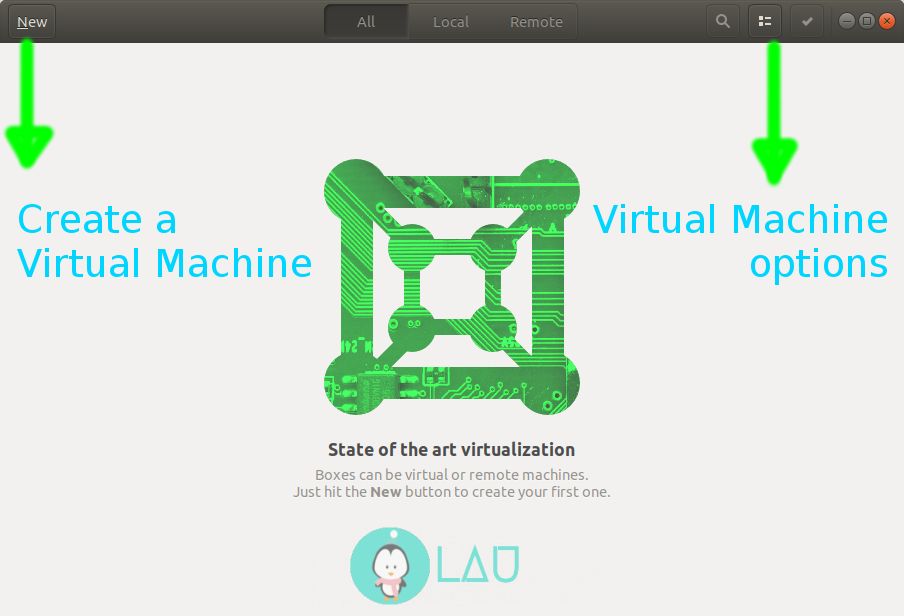
The interface is simple and intuitive for newbies to get familiar with right away without much effort. Boxes don’t feature a menu bar or toolbar, unlike Oracle VirtualBox. On the top left is the New button. It is used to create a VM. On the right, there are buttons for VM options. These include deleting a list or grid view and configuration. The configuration options become available when a VM is created.
Installing an Operating System
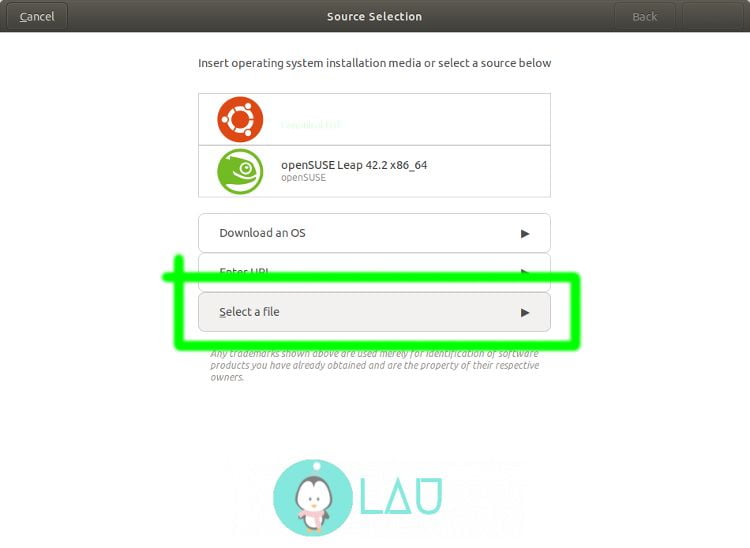
Click the New button and choose “Select a file”. Select the downloaded Lubuntu image file on the Downloads library and click the Create button.
If this is your first time installing an OS on a VM, don’t panic when the installer pops up a window asking you to erase the disk partition. It’s safe. Your physical computer hard drive won’t be erased. Only the storage space will be allocated for your VM. So, if you give 30 GB for your VM on a 1TB hard drive, performing an erase partition operation on Boxes will only erase that virtual 30 GB storage drive, not the physical storage.
Usually, computer students find virtualization a valuable tool for practicing advanced partitioning using UNIX-based OS. You can, too, since no risk would tamper the main OS files.
Once you install Lubuntu, the installation process prompts you to reboot the computer (VM) to complete the installation and boot from the hard drive. Confirm the operation.
Sometimes, certain Linux distros hang in the reboot process after installation. The trick is to force shut down the VM from the options button on the top right side of the title bar and then power it on again.
Set up Guest tools
You may have noticed that Lubuntu’s screen resolution is small, with additional black spaces on the left and right sides. Additionally, folder sharing is not enabled. This brings up the need to install guest tools on Lubuntu.
Launch the terminal from the guest session (not your host terminal program) and install the guest tools using the below command –
sudo apt install spice-vdagent spice-webdavdAfter that, reboot Lubuntu, and the next boot will set the VM to its appropriate screen resolution; no more extra black spaces on the left and right side. You can resize the Boxes window, and the guest screen resolution will automatically resize itself.
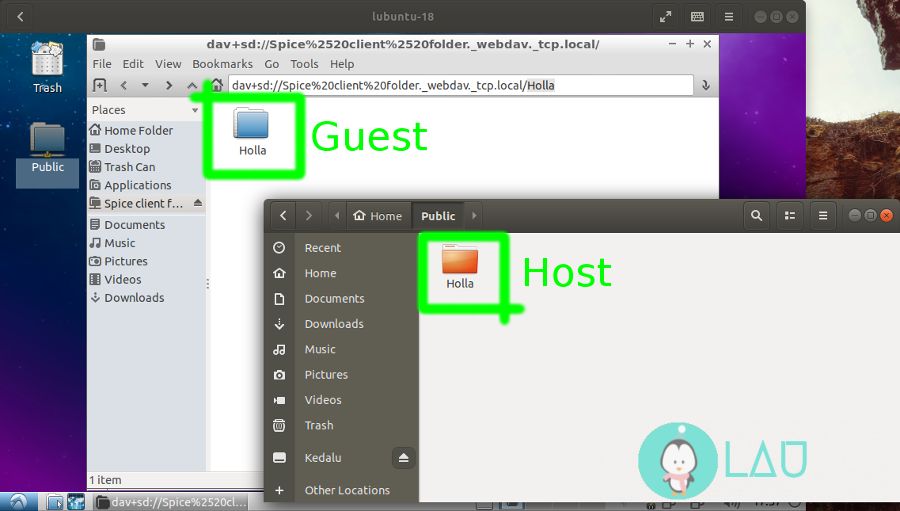
To share a folder between the host and guest, open Boxes options while the guest is still running and choose Properties. On the Devices & Shares category, click the + button and set up the name.
By default, the Public folder from the host will be shared with the guest OS. You can configure the directory of your choice. Select Network and choose Spice Client Folder. After that, launch Lubuntu’s file manager program (PCManFM) and click the Go menu on the menu bar.
The first time you try to open it, a dialog box will pop up, asking you which program should handle the network. Select PCManFM under the Accessories category, and the network will be mounted on the desktop. Launch it, and there you’ll see your shared folder name. Subsequent network launches will directly open the shared folder, so you don’t have to open the folder manually next time.
Where’s the OS installed?
Lubuntu is installed as a VM using GNOME Boxes, but where does it store the disk image?
This question is particularly interesting for those who wish to move a huge image file to another partition with sufficient storage. The trick is using symlinks which is efficient as it saves more space for the Linux root partition and or home partition, depending on how the user set it up during installation. Boxes store the disk image files in the ~/.local/share/gnome-boxes/images folder.
Conclusion
We’ve successfully set up Lubuntu as a guest OS on our Ubuntu. You can try other variants of Ubuntu, such as Kubuntu, Ubuntu MATE, Xubuntu, etc., Or you can try some random Linux distros, which would be pretty challenging due to varying package management.
There is no harm in wanting to. On your computer, you can install other platforms, like Microsoft Windows, OpenBSD, etc., as a VM. And by the way, remember to leave your opinions in the comment section below.
Frequently Asked Questions
Is GNOME Boxes any good?
Is GNOME Boxes better than VirtualBox?
GNOME Boxes and VirtualBox are virtualization applications allowing users to create and manage virtual machines on Linux systems. However, they have some differences in terms of features and functionality.
What is the difference between Linux GNOME Boxes and VirtualBox?
On the other hand, VirtualBox is a more advanced virtualization solution that offers a wide range of features and capabilities. It supports a broader range of operating systems, including Windows, macOS, and Linux, and offers more advanced networking and storage options. It also has a larger user community, meaning users can find more resources and support for VirtualBox online.