

Welcome to the third part of web server setup series. In the last article, I fixed all the errors and warnings of CWP. We’re now ready to point a domain to our server. In this article, we’ll setup our domain name to point to our hosting and then host a WordPress website. So let’s get started!
For this article, I have setup a new user account ‘sohail’ and assigned it 1000MB storage, 2 email accounts, 2 FTP accounts, 2 databases, and 2 addon domains.

Connect Domain Name To CWP Web Panel
After we’ve setup the panel, we can easily point our domain name to the hosting. In the last article, we created a user account and entered the primary domain name ‘desihackr.in’. We can now point out that the primary domain name ‘desihackr.in’ to our hosting and manage it from the user account. For this article, I’ve purchased the domain name from Godaddy. You may have purchased from other providers but the process is similar.
Method 1. Create a DNS record
In the first article of the series, I mentioned what DNS is. DNS keeps records of IP addresses point to different domain names. It’s like a phone book where different Names point to their contact numbers. When you want to point your domain name to hosting on a server, you can create a DNS record and save your IP address in that record.
Almost all major Domain providers have DNS management tools. For the purpose of this article, I’m using Godaddy but the process is similar for all other services. But if you find hard to get to DNS management tool for your account, you can contact support and they should help you.

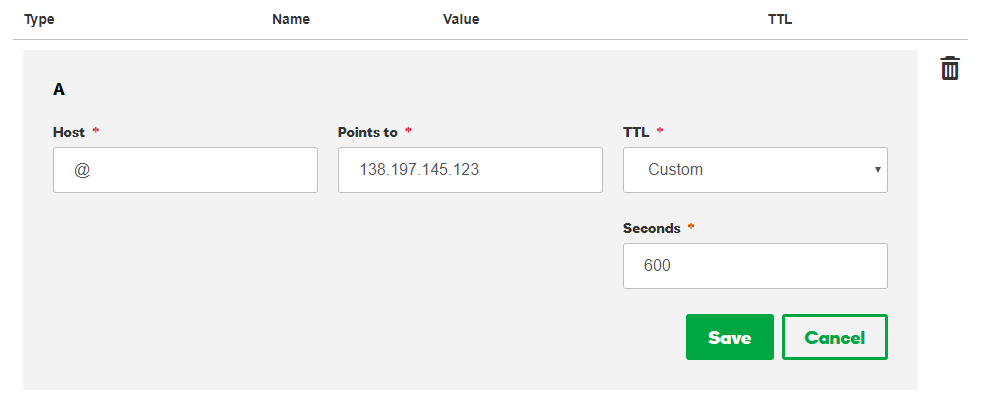
DNS management tools are really very easy to use. To point a domain, create ‘A’ record and enter your server IP address.

Create a record of type ‘A’ and enter the IP address of your server. Add another record of type ‘CNAME’ and name it as WWW, point it to server IP. After you add records, give it some time.
According to most domain providers, the DNS update may take 24 hours. But I have seen it takes more than 20 minutes. And after the DNS records have updated, visit the domain name. In my case, it is ‘desihackr.in’. So this is what it points to –
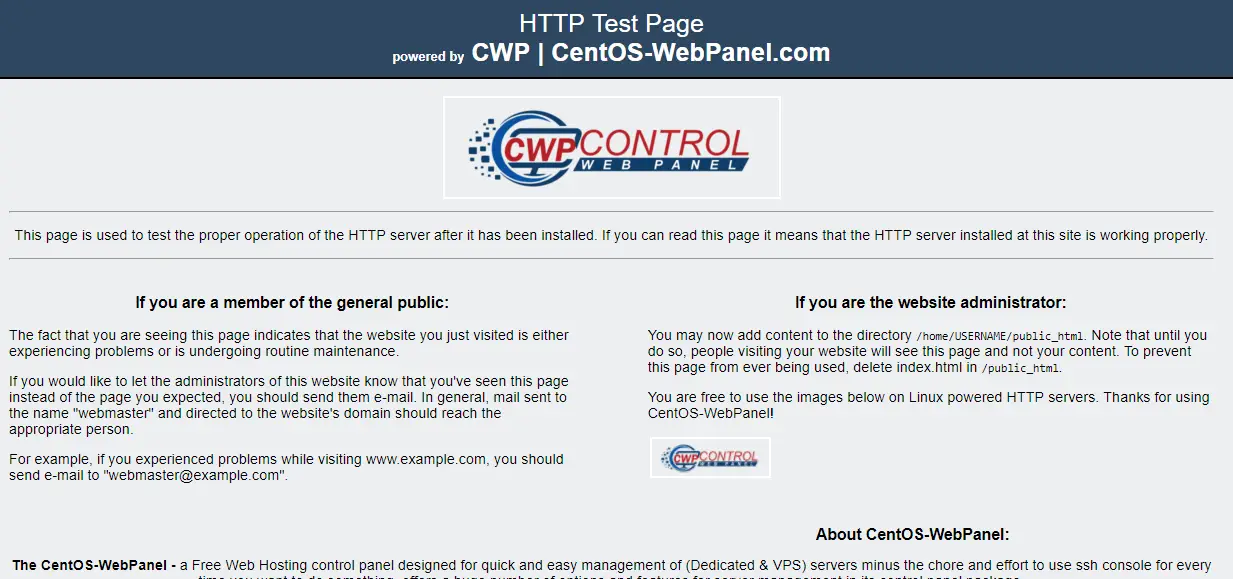
Note: If you still see the error when you visit the domain, try clearing your web browser cache. Also, use tools like gopeeker to check if your website is accessible from other locations in the World.
So you can now visit your web hosting panel typing your domain name with the panel port.
desihackr.in:2030 (Admin panel)
desihackr.in:2082 (User panel)
Method 2. Change Nameservers
In the above method, I pointed the domain name to hosting by changing/creating DNS records in the DNS management tool provided by my domain provider. But we can also use other popular free & paid DNS services. There are benefits of using other DNS services. DNS services can provide so many other features which your domain provider can’t or provide at a high price. For example, a DNS provider can add extra layers of security such as DDOS protection, SQL injection protection and so on.
Some of the popular freemium DNS services are CloudFlare, FreeDNS (From CentOS), NameCheap FreeDNS, and NS1.
I prefer CloudFlare because it provides several services at no cost such as CDN (content delivery network), DDOS protection, Firewall, Site caching, SSH certificates, and of course DNS management tool.
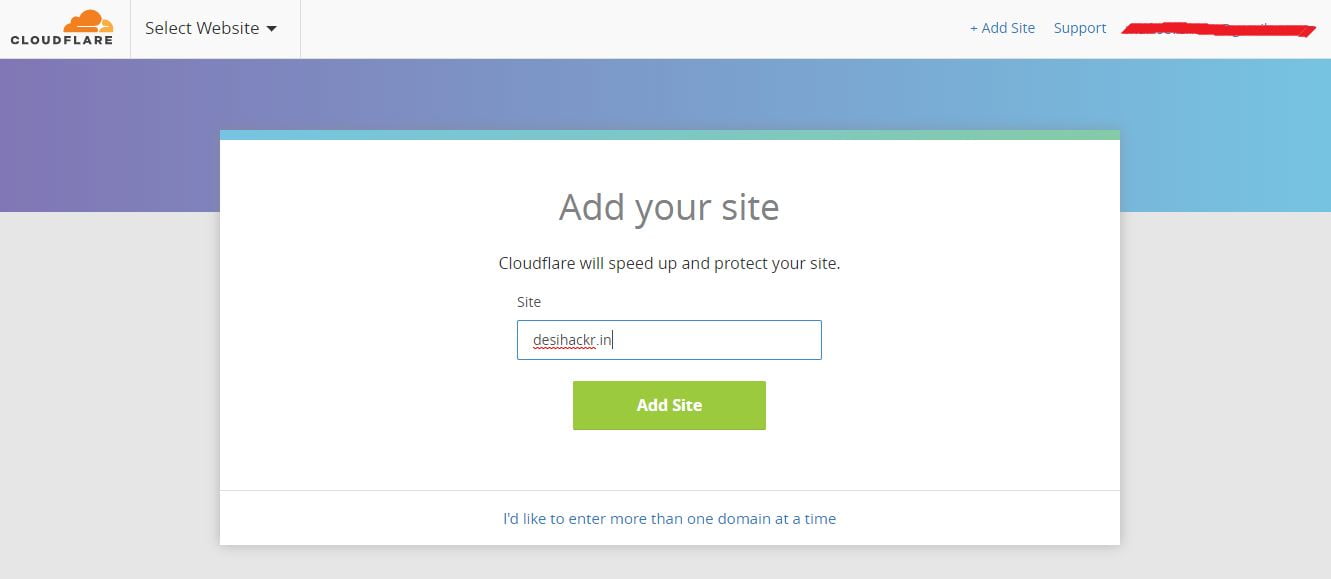
Add website
It’s easy to setup Cloudflare. Sign up for an account and add a site.
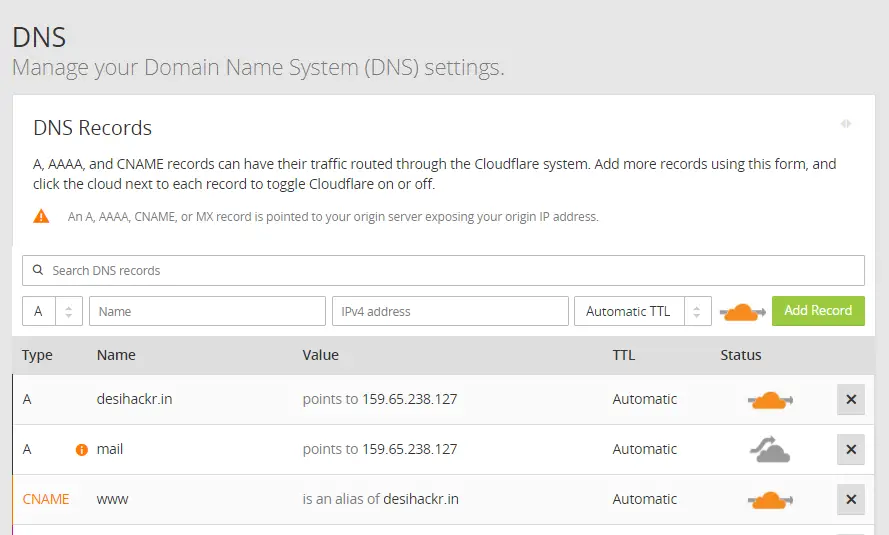
Once you click add a site, Cloudflare will detect and save domain existing DNS records. Click next and you’ll get nameservers like these –
Now all you need to do is update existing domain nameservers to ones given by Cloudflare. This way all the traffic will go through Cloudflare network and you can use various security features provided by them. Once you update nameservers, your domain will activate in Cloudflare account.

Now, wait for some time, maybe 20 minutes or so till the DNS update finishes. And after the DNS are updated successfully, your domain will point to your server. So these were two methods to point your domain name to your own web server. The first one was a little quick, it just required to add an ‘A’ record with the server ip. But I suggest the second method. As you improve your skills as a server administer, you’ll need to use extra services (Firewall, HTTPS, etc.) which Cloudflare or any other DNS provider can provide.
Also, do not forget that you can add more domains to your account just by creating addon domains. Follow the same steps and you’ll be able to host multiple websites on your server. Well, do not worry we’ll do that in the next article.
So this was it. So far in this web server setup series, we have setup our own web server, installed control panel on it and pointed domain name to our web server. In the next article, we’ll move on to hosting our first website on our own web server.
If there is something that you didn’t understand, let me know in the comment section below. I’ll be there.