Setup Dual Boot Linux And Remix OS With GRUB Customizer
Table of Contents
Remix OS is a famous android based Linux distro that has gained a wide name since its launch. Almost everyone who loves android and uses Linux distro knows it. I myself use it almost on a daily basis because it helps me to download and use my favorites apps that are available only on Android.
However, when it comes to dual boot, Remix OS has been a problem. If you don’t know, Remix OS firstly uses GRUB as a bootloader, not GRUB2. Secondly, it doesn’t automatically scan whether you got any other distro present or not (except Windows). There are many guides available on the internet for this but many of those guides either don’t work or are outdated. So I decided to write a short guide on it. Let’s get to work.
Requirements
Download Remix OS from its official website.
As per Jide, the latest version is 3.0.207.
Install GRUB Customizer
You will need it for easy customization. The real magic of dual boot is in correct GRUB entry.
sudo add-apt-repository ppa:danielrichter2007/grub-customizer
sudo apt-get update
sudo apt-get install grub-customizer
If you want, here is the launchpad link for it.
Step 1
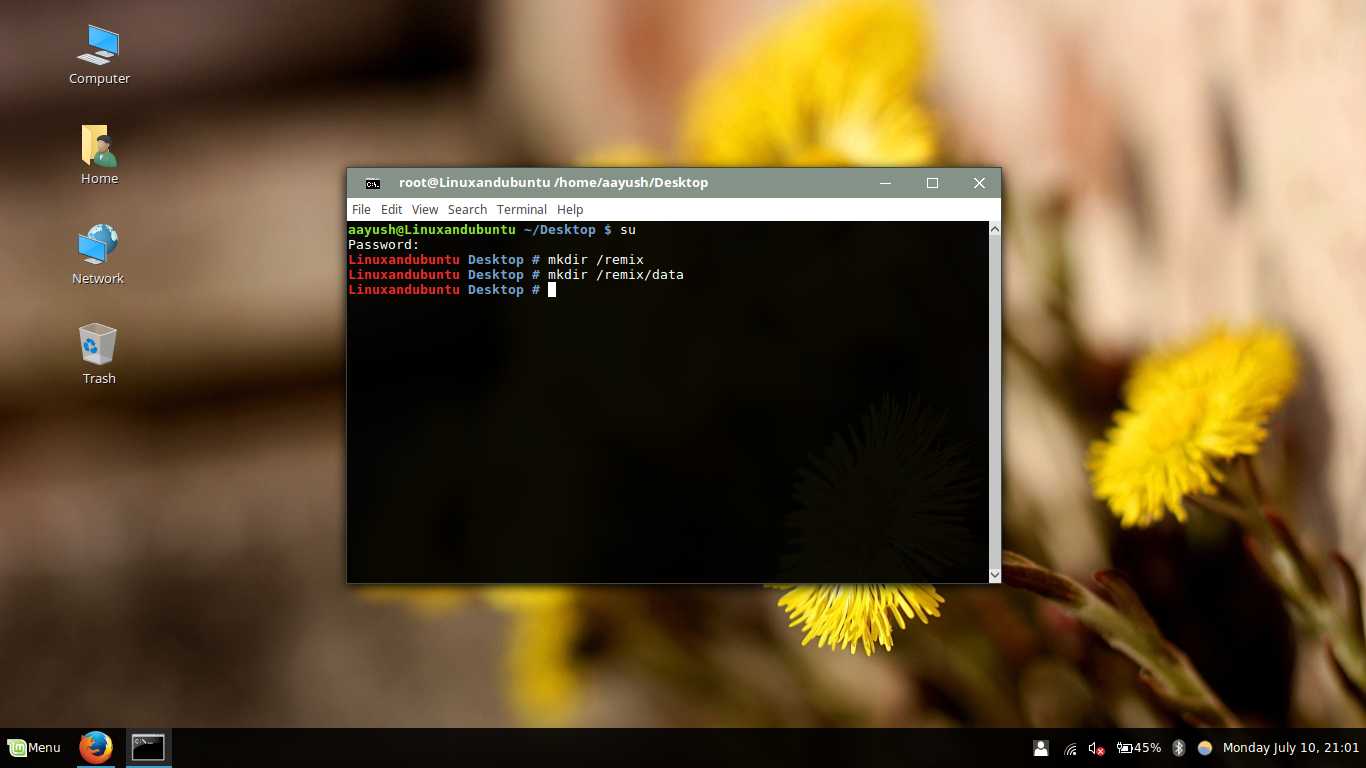
Open Terminal and input the below commands. You need to be superuser to use below commands. Superuser access can be acquired by typing “su” or “sudo” in most distros. You need to enter your password which will remain invisible. This is normal.
sudo mkdir /remix
sudo mkdir /remix/data
Step 2
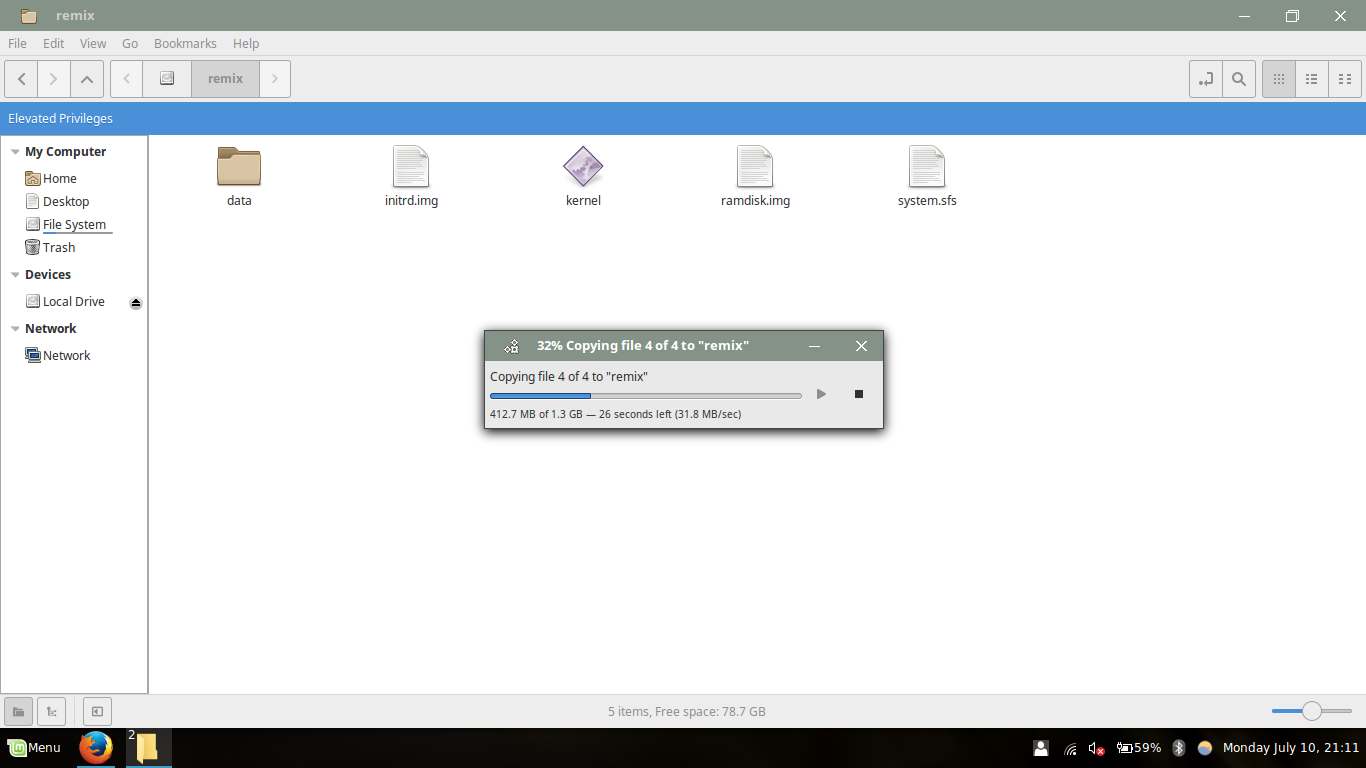
Now, you need to extract the Remix OS zip file you downloaded from above link I’ve provided. You will find Remix OS.iso file here, Extract the .iso file in a separate folder. Now open the file manager with root access. Copy the four files i.e. initrd.img, kernel, ramdisk.img, and system.sfs to remix folder you created in the above step.
The folder should be located at the root of the system. Open your file system root level and you will find it.

Step 3
Now open GRUB customizer. Find the default entry here through which your current OS boots. It is generally named with your OS name and is located at the top.Select it and hit the edit option on top pane.
Now copy the whole entry and quit the dialog box. Now in the top pane select the option to create a new entry.
Name it as Remix-OS and in type, select other.
Now in the boot sequence space paste the entry you just copied.
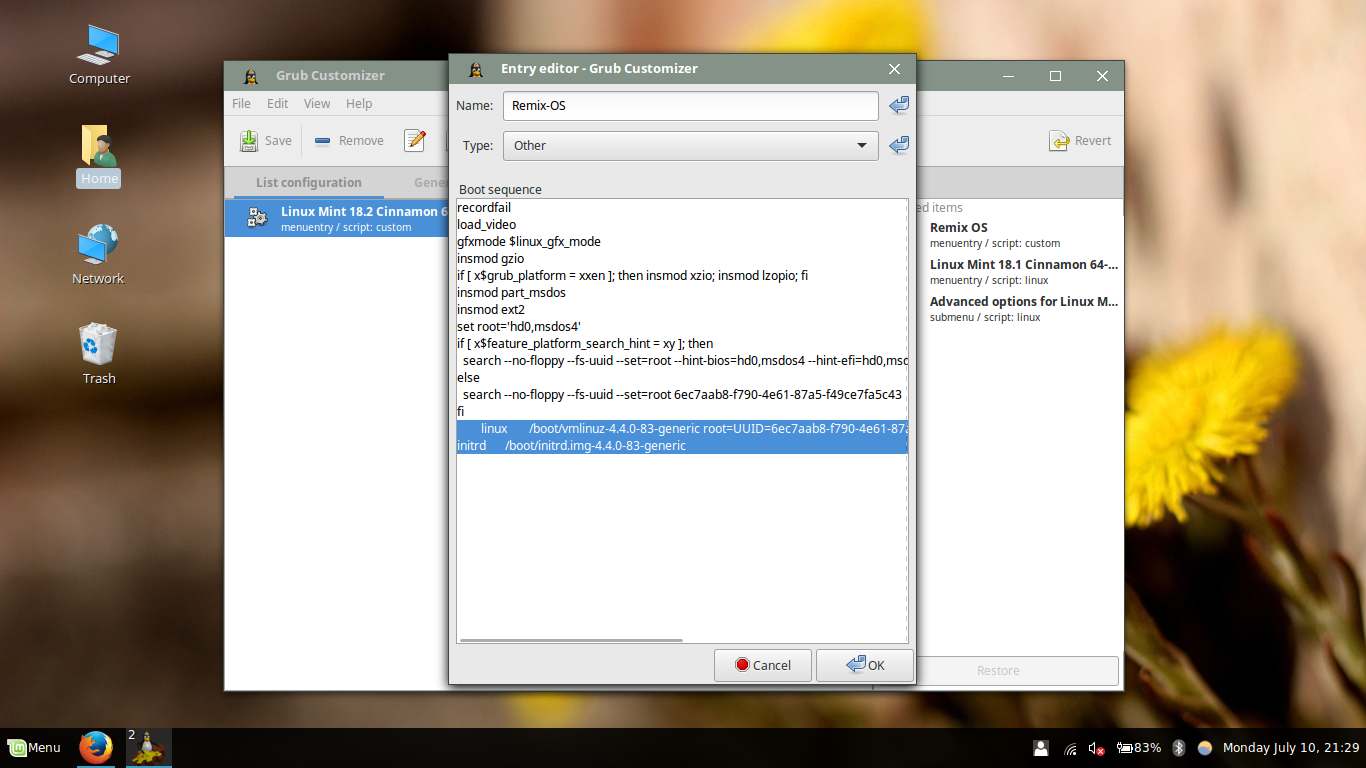
Find the two lines that indicate the location of vmlinuz and initrd. They are usually located at the bottom and start with Linux and initrd.

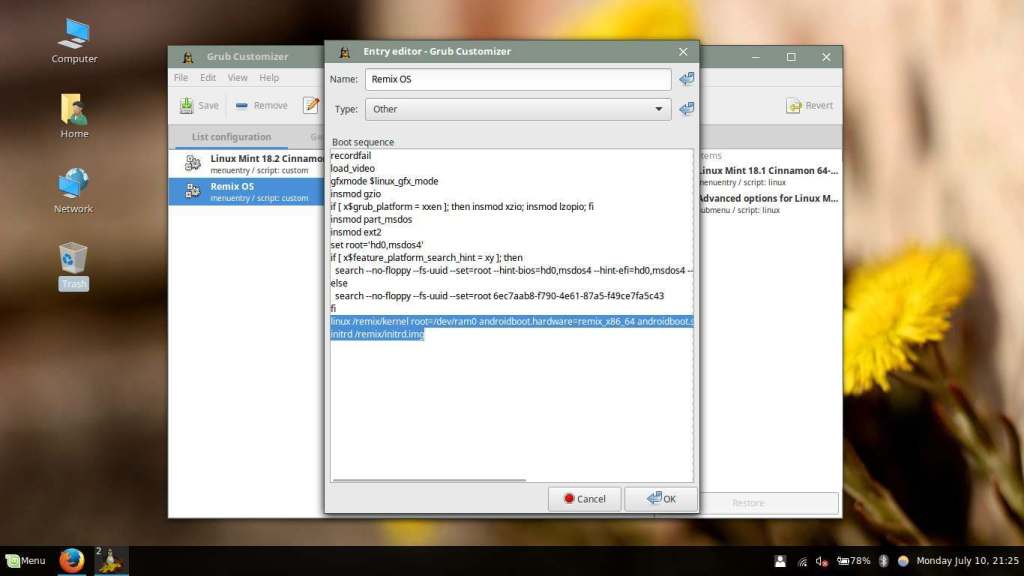
[The highlighted portion are the entries that you need to find.] Now replace them with these two entries.
linux /remix/kernel root=/dev/ram0 androidboot.hardware=remix_x86_64 androidboot.selinux=permissive CMDLINEinitrd /remix/initrd.imgIt will look something like this now. Remember incase you are using a 32-bit version using below entry.
linux /remix/kernel root=/dev/ram0 androidboot.hardware=remix_x86 androidboot.selinux=permissive CMDLINEinitrd /remix/initrd.img
Save the entry and exit. GRUB Customizer may ask you to save it or not. Select to save and exit. Make sure the entry is the 2nd number by moving it with the arrow keys on the top pane.
On the general settings tab, make sure GRUB is visible on the visibility entry option. Set time to 10 sec for better control.
Step 4
You have successfully completed the guide. Now reboot the PC and when GRUB menu appears select the Remix OS option and wait. First boot will take a much longer time for about 15-20 min. That’s normal.
Conclusion
Remix OS is a nice OS that will surely help users to have android on PC at its boom time. However, Remix OS sadly doesn’t support HDMI input and you cannot receive OTA updates if you installed it on Hard Drive without their tool which is compatible with windows only. Still, it’s a pleasure to try Remix OS on dual boot platform. I will be happy to help you if you guys find any difficulties in the above guide. Feel free to drop a comment.
LinuxAndUbuntu Newsletter
Join the newsletter to receive the latest updates in your inbox.


