What Is Android Development Kit (Features And Installation)
Table of Contents
Are you interested in writing android apps? Well, Google has worked really hard to make doing this as simple as it can be. Previously, you needed to download Eclipse and the Android Developer Tools separately and getting it to work was quite a hassle. With Android Studio, Google has provided a very simple and straightforward tool needed to start developing Android apps.
Android Studio comes with a full-blown IDE (Integrated Development Environment) with a code editor, a ton of automation tools and a debugger. It also comes with a virtual machine manager and the Android SDK.
Android Studio Features At A Glance
Android Studio comes with a ton of features that make developing Android apps quite easy. Some of the features include –
- IntelliJ IDE + Android Studio plugin
- Android SDK Tools
- Android Platform-tools
- A version of the Android platform
- Android Emulator with an Android system image including Google Play Services
- A flexible Gradle-based build system
- A fast and feature-rich emulator
- A unified environment where you can develop for all Android devices
- Instant Run to push changes to your running app without building a new APK
- Code templates and GitHub integration to help you build common app features and import sample code
- Extensive testing tools and frameworks
- Lint tools to catch performance, usability, version compatibility, and other problems
- C++ and NDK support
- Built-in support for Google Cloud Platform, making it easy to integrate Google Cloud Messaging and App Engine
Also Read – 8 Best IDEs Or Code Editors For Linux
System Requirements
These are the system requirements required for Linux OSes.
- GNOME or KDE desktop
- Tested on Ubuntu® 12.04, Precise Pangolin (64-bit distribution capable of running 32-bit applications)
- 64-bit distribution capable of running 32-bit applications
- GNU C Library (glibc) 2.11 or later
- 2 GB RAM minimum, 8 GB RAM recommended
- 2 GB of available disk space minimum,
- 4 GB Recommended (500 MB for IDE + 1.5 GB for Android SDK and emulator system image)
- 1280 x 800 minimum screen resolution
- For accelerated emulator: Intel® processor with support for Intel® VT-x, Intel® EM64T (Intel® 64), and Execute Disable (XD) Bit functionality, or AMD processor with support for AMD Virtualization™ (AMD-V™)
Installation
- Install the latest version of Java 8. Make sure you install the version that is compatible with your OS, that is either 32bit or 64bit. Get it from here.
- Download the latest Android Studio from here.
- Unpack the .zip file you downloaded to an appropriate location for your applications, such as within /usr/local/ for your user profile, or /opt/ for shared users.
- To launch Android Studio, open a terminal, navigate to the android-studio/bin/ directory, and execute studio.sh.
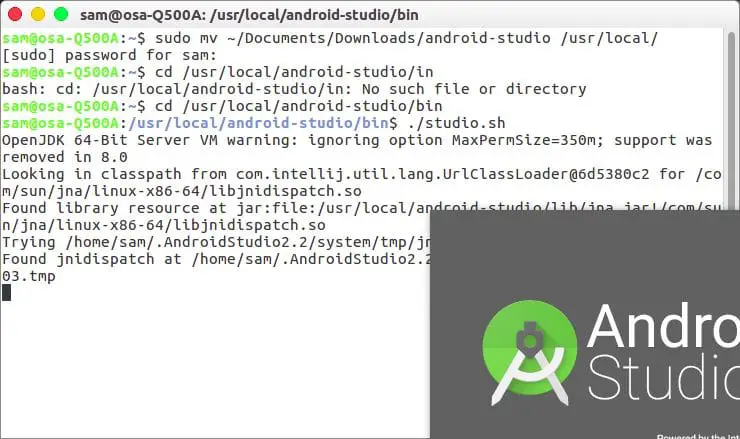
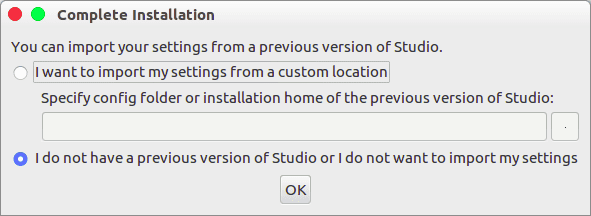
5. Select whether you want to import previous Android Studio settings or not, then click OK.
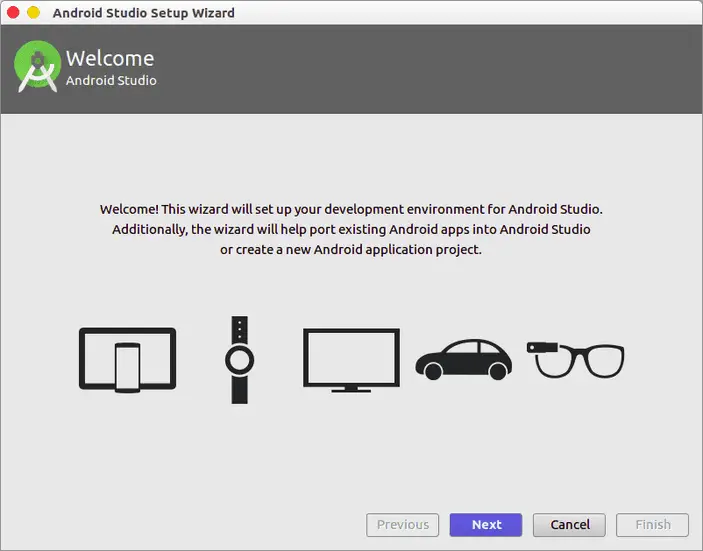
6. The Android Studio Setup Wizard guides you through the rest of the setup, which includes downloading Android SDK components that are required for the development.
7. If you are running a 64-bit version of Ubuntu, you need to install some 32-bit libraries with the following command:
sudo apt-get install libc6:i386 libncurses5:i386 libstdc++6:i386 lib32z1 libbz2-1.0:i386
8. To make Android Studio available in your list of applications, selectTools > Create Desktop Entry from the Android Studio menu bar.
9. And you have Android Studio set-up on your Ubuntu desktop.
Starting a New Project
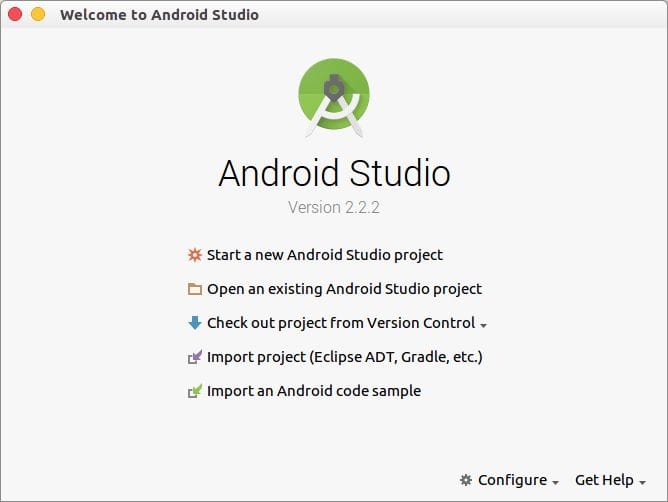
Upon starting Android Studio, just click on “Start a new Android Studio project”.
User Interface
The Android Studio’s main window is made up of several logical areas identified in the figure below.
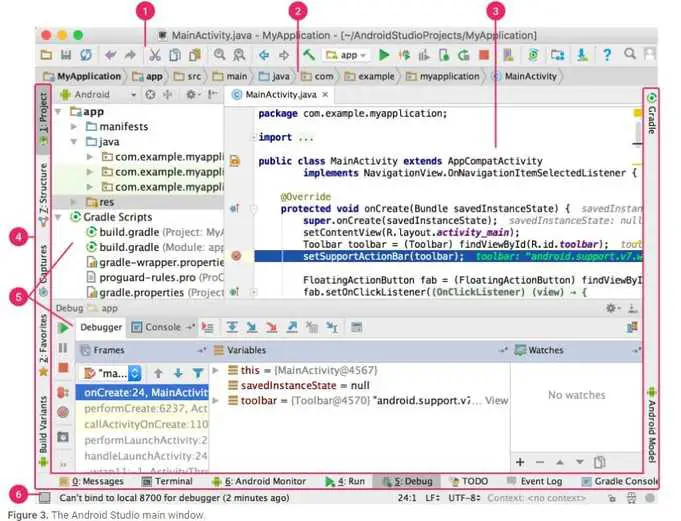
- The toolbar lets you carry out a wide range of actions, including running your app and launching Android tools.
- The navigation bar helps you navigate through your project and open files for editing. It provides a more compact view of the structure visible in the Project window.
- The editor window is where you create and modify code. Depending on the current file type, the editor can change. For example, when viewing a layout file, the editor displays the Layout Editor.
- The tool window bar runs around the outside of the IDE window and contains the buttons that allow you to expand or collapse individual tool windows.
- The tool windows give you access to specific tasks like project management, search, version control, and more. You can expand them and collapse them.
- The status bar displays the status of your project and the IDE itself, as well as any warnings or messages.
You can organize the main window to give yourself more screen space by hiding or moving toolbars and tool windows. You can also use keyboard shortcuts to access most IDE features.
At any time, you can search across your source code, databases, actions, elements of the user interface, and so on, by double-pressing the Shift key, or clicking the magnifying glass in the upper right-hand corner of the Android Studio window. This can be very useful if, for example, you are trying to locate a particular IDE action that you have forgotten how to trigger.
The Gradle
Gradle is an advanced build system that allows users to create custom build logic through plugins. It makes it easy to reuse code and resources. It also makes it easy to create several variants of an application, either for multi-apk distribution or for different flavors of an application.
The Android SDK
The Android SDK includes the complete set of development and debugging tools for the Android SDK. It is included with Android Studio.
AVD Manager
An Android Virtual Device (AVD) definition lets you define the characteristics of an Android phone, tablet, Android Wear, or Android TV device that you want to simulate in the Android Emulator. The AVD Manager helps you easily create and manage AVDs to test apps on. You can set up Android virtual devices. You can configure just about anything from the device screen size to the system architecture.
Conclusion
You’ve installed and configured Android Studio and now you’re ready to build your Android application. Android is the most popular platform ever. Android Studio, having replaced Eclipse makes developing android apps quite fun and a whole lot easier.
So what are you waiting for? Start developing already! Portions of this page are modifications based on work created and shared by the Android Open Source Project and used according to terms described in the Creative Commons 2.5 Attribution License.
LinuxAndUbuntu Newsletter
Join the newsletter to receive the latest updates in your inbox.


