WordPress Menu
Table of Contents
Welcome back to WordPress 101 series. The series is dedicated to teaching WordPress CMS to WordPress beginners. If you have any questions, let me know in the comment section below.
In this article, we will learn to structure menu(s) in a WordPress site. Menu(s) is an important part of any website. It is where website admin can put important links such as important categories, pricing page, FAQs, contact us, etc.
WordPress Menu
Depending on your website theme, the main can be on top of the header, bottom, or even the sidebar. Most website menus are between the header and the content section of the website.
A website can also have multiple menus, such as a navigation menu and footer menu. But managing menus in WordPress is easy regardless of where a particular theme puts its menus.
If your website provides different locations for a menu, you can select the locations of a particular menu, and it’ll appear on that location.
Create WordPress Menu
One can use the Customizer to create, edit, and delete a menu or use a separate page under Appearance > Menus.
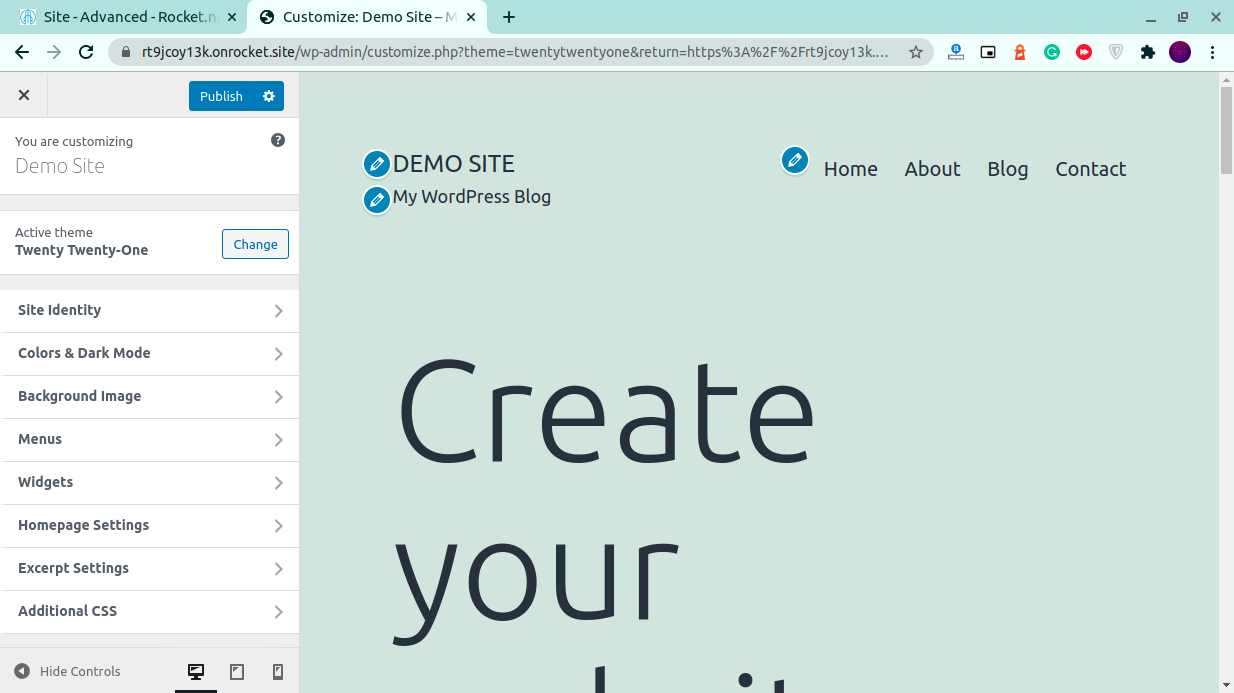
WordPress Customizer is the best way to edit menus or other parts of the website as it provides a live preview as you make changes. Open customizer from Appearance > Customize.

On the left-hand side, you can see the website settings, and on the right-hand side, a live preview. Customizer is best when you are updating the menu, tweaking website colors, etc.
Click Menus to create or update menus.

As you can see in the above screenshot, the first highlighted section shows the existing menus, and the other section shows the locations that menus can appear on the website.
The default WordPress installation creates two menus, namely, the Primary menu and the Secondary menu. One can create many menus, but the website can only show several menus that the current theme supports.
WordPress default themes support two menu locations. Primary menu appears in the header, and the Secondary menu appears in the footer.


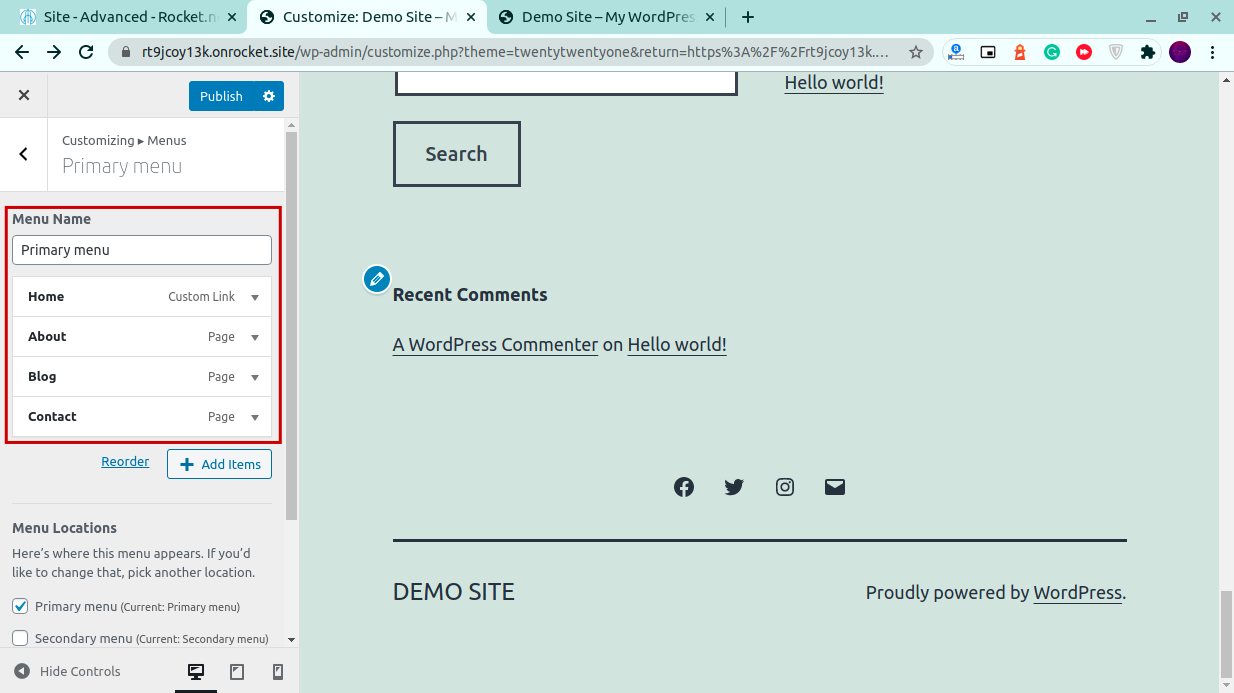
To edit a menu, click the menu and drag and drop menu items to change items’ position in the menu, add new items by clicking Add items, or delete an item.


WordPress allows adding different items to a menu such as a page, category, specific post, tags, etc.
To add an item, click Add items button and click any item to add it to the menu. The new item appears in the last. Drag and drop it to change its position in the menu.

Once the menu has been customized, scroll down and select the menu location. You can show the same menu in multiple locations.
You can also set to automatically add new top-level pages to the menu by enabling the setting under Menu Options.
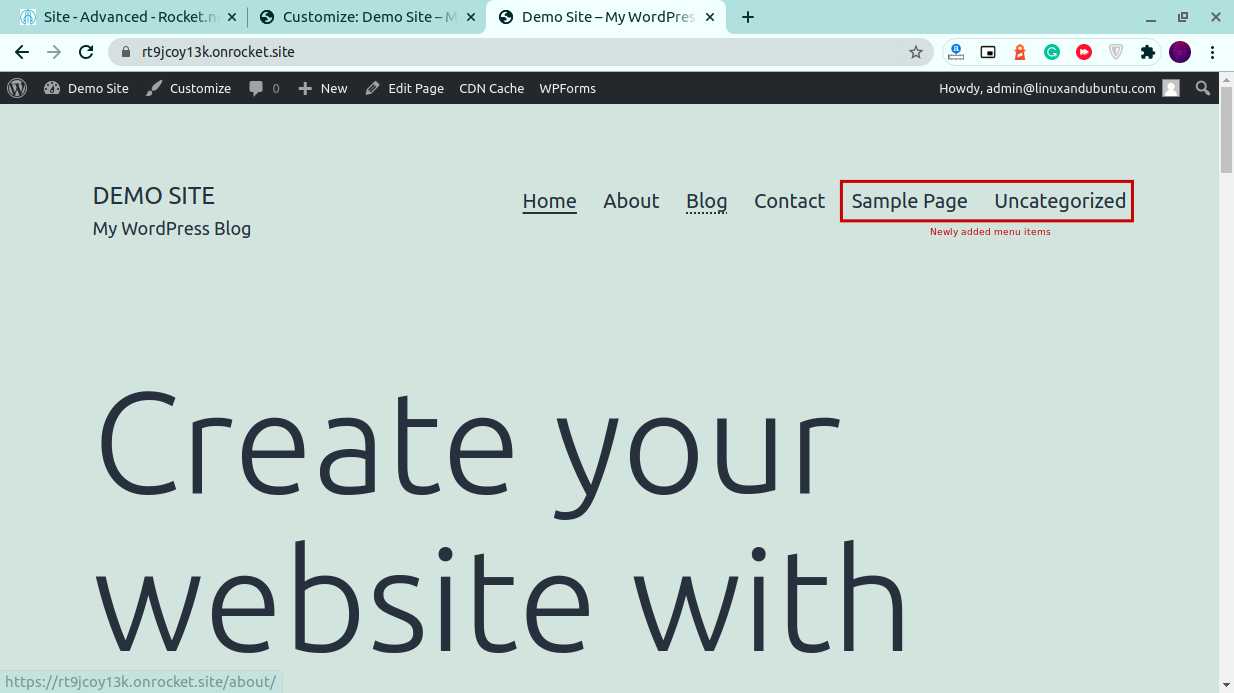
Once you’re done updating your menus, click Publish button to publish changes to the live website.

So this is how to add or update menus from WordPress customizer. The other way to add or update menus is from Appearance > Menus.

This page is mainly divided into three sections. First, select the menu to be updated, add new items from the second section, and change item positions and menu locations from the third section. You can do everything that you did in Customizer but without a live preview.
To delete a menu, click Delete menu at the end of the third section.
Conclusion
So that’s it. This is how easy it is to add or update menus in WordPress. To add the Mega menu or add more menu locations, go through your theme’s documentation. If your theme does not support a specific feature, don’t worry; search for a plugin to add functionality such as Mega menu.
Learn more about WordPress plugins.
LinuxAndUbuntu Newsletter
Join the newsletter to receive the latest updates in your inbox.


